Sign in with Google
Signing in with Google is achieved using the <SignInWithGoogle /> component in app/components/Auth/SignInWithGoogle/index.tsx. This
opens the in-app browser to facilitate signing in with your Google account. This sign in method is available on both iOS and
Android.
The core logic of this feature relies on Supabase to initiate the login process with a third party provider:
const { data, error } = await supabase.auth.signInWithOAuth({
   provider: "google",
   options: {
      redirectTo,
      skipBrowserRedirect: true,
   },
});
Returned from supabase.auth.signInWithOAuth() is an object with the property data` - this contains the URL that the user will use to sign in with
their Google account. The logic for opening the browser is below:
const res = await WebBrowser.openAuthSessionAsync(
   data?.url ?? "",
   redirectTo // this is set to the URL for the app
);
Upon a successful login from the user, we then create a session with Supabase using supabase.auth.setSession() - this uses the access token
received from supabase.auth.signInWithOAuth(), and the access token can later be used to call your APIs securely.
Enabling Sign in with Google for your project
There are three steps to enabling sign in with Google:
- create a project in Google Cloud Console
- create the OAuth consent screen
- generate OAuth 2.0 Client IDs
Please follow the steps in this order to conigure this sign up option correctly.
Create a project in Google Cloud Console
The first step to enabling sign in with Google is creating a project in the Google Cloud Console. You can follow this (opens in a new tab) video as an example. Once you create a project, the next step is to update the OAuth Consent Screen settings.
OAuth Consent Screen
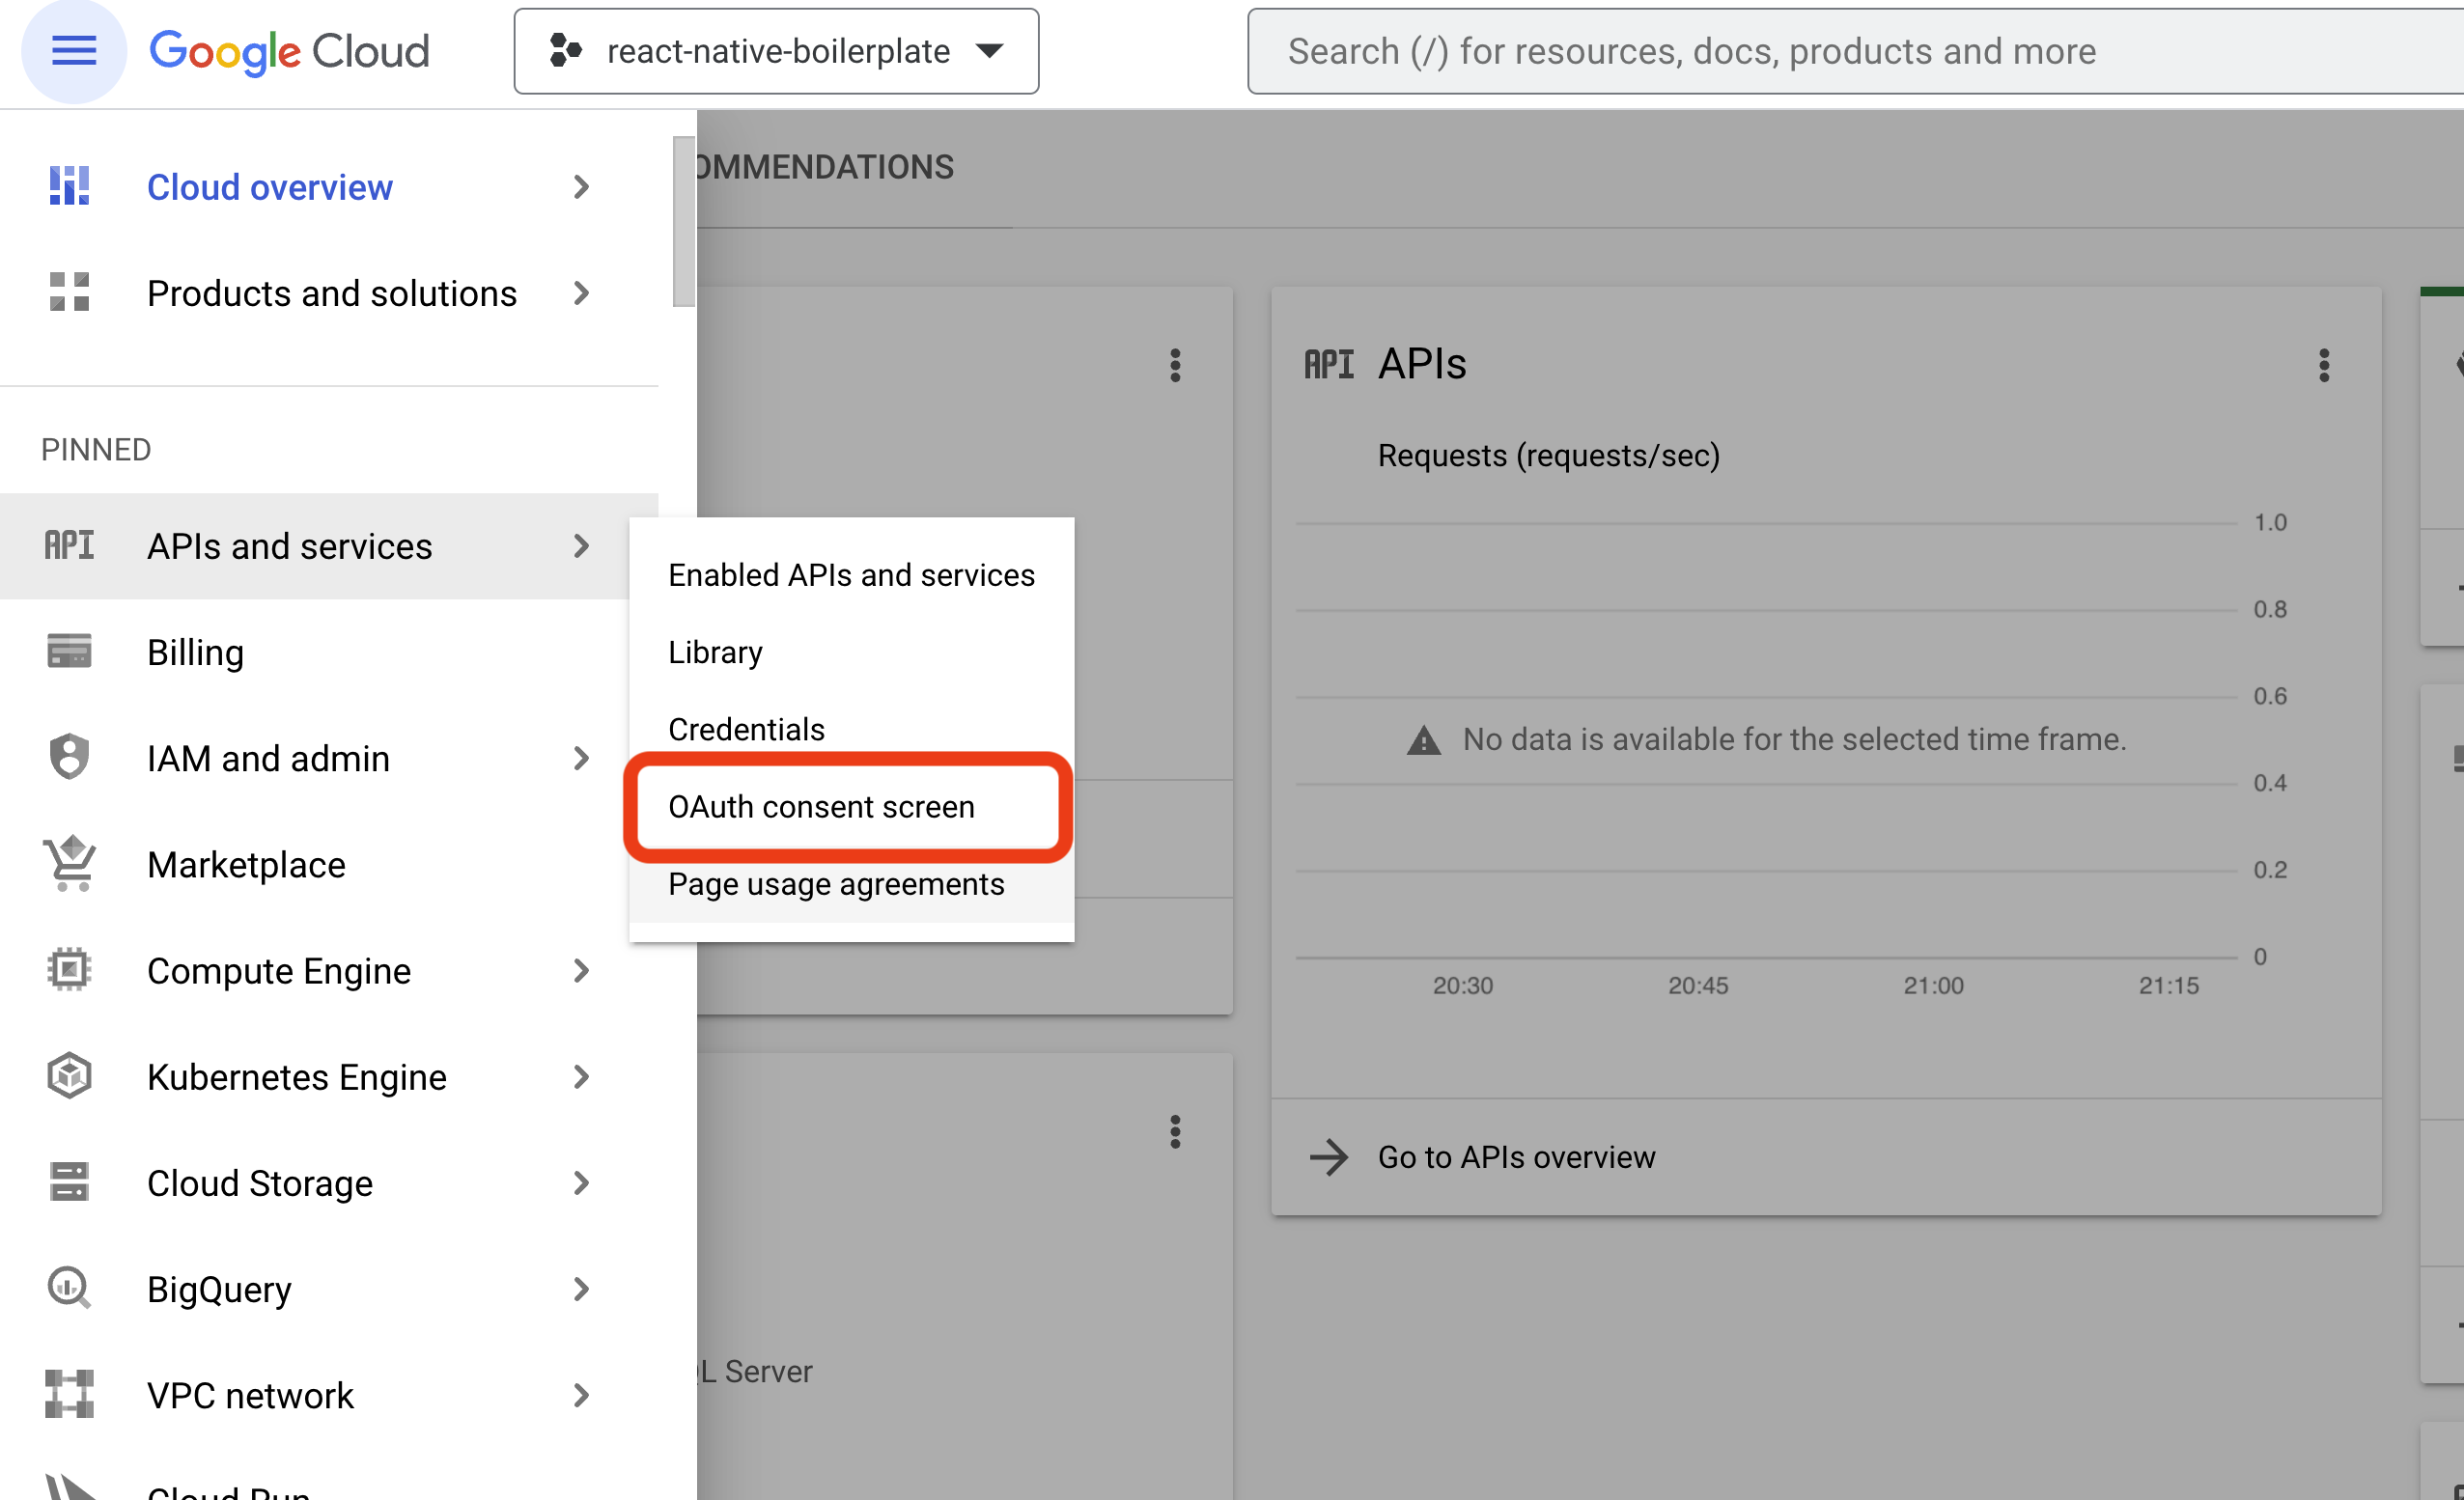
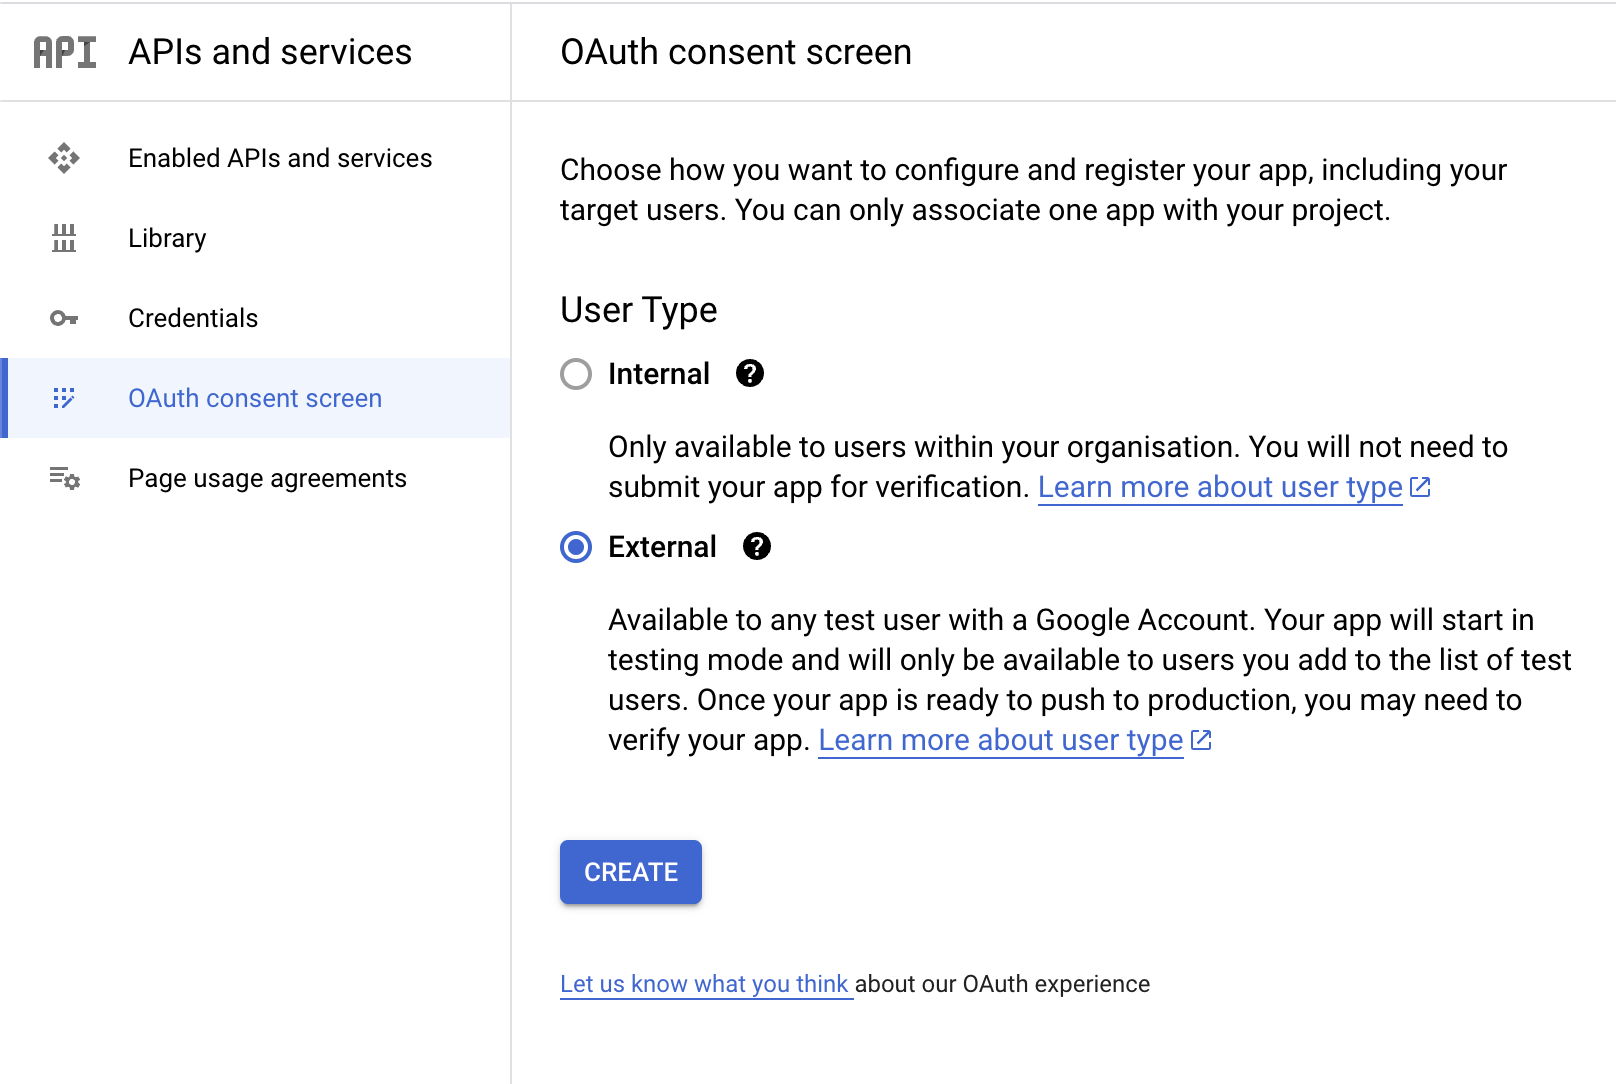
The OAuth Consent Screen is a temporary screen that allows users to log into their Google account. It specifies the name of the app and what permissions that app has on your Google account. First, navigate to the OAuth Consent Screen and set the User Type to External:
- Navigate to OAuth Consent Screen
- Set the User Type to External
Next, edit the app registration and provide an app name, user support email address, an authroised domain and a developer contanct email:
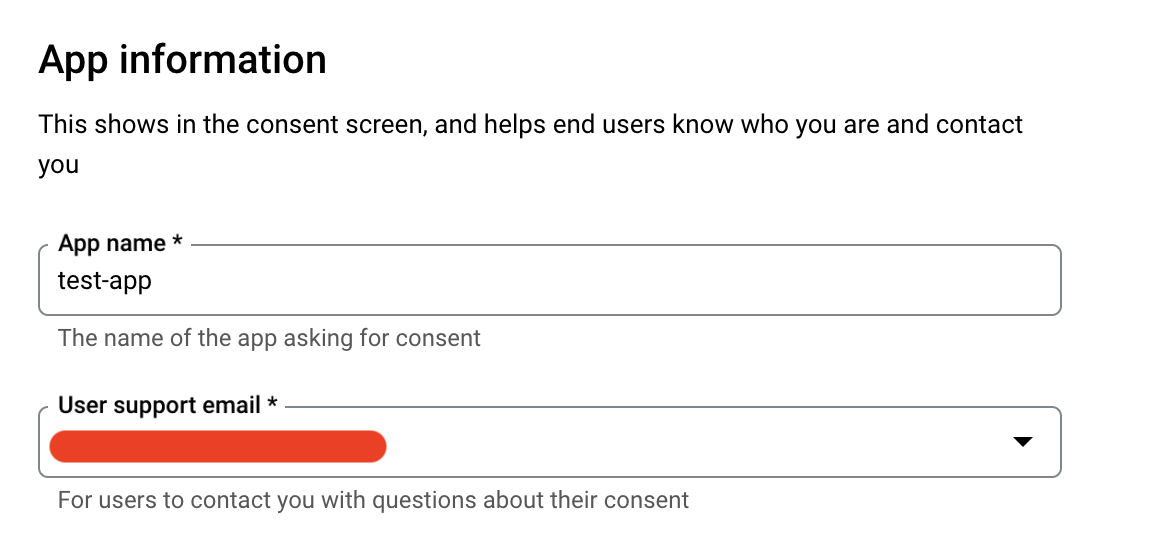
You can skip App logo and App Domain as they are not mandatory.
For the authorised domain, you need to set this to the project URL that is set in Supabase - it follows this format:
<PROJECT_ID>.supabase.co (exclude the https protocol in the URL). You will also need to set the developer
contact information:

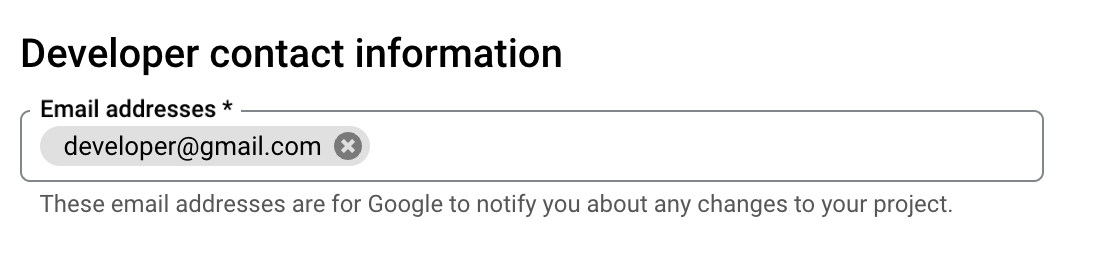
Once complete, you can click Save and continue on the remaining sections of the OAuth consent screen.
OAuth 2.0 Client IDs
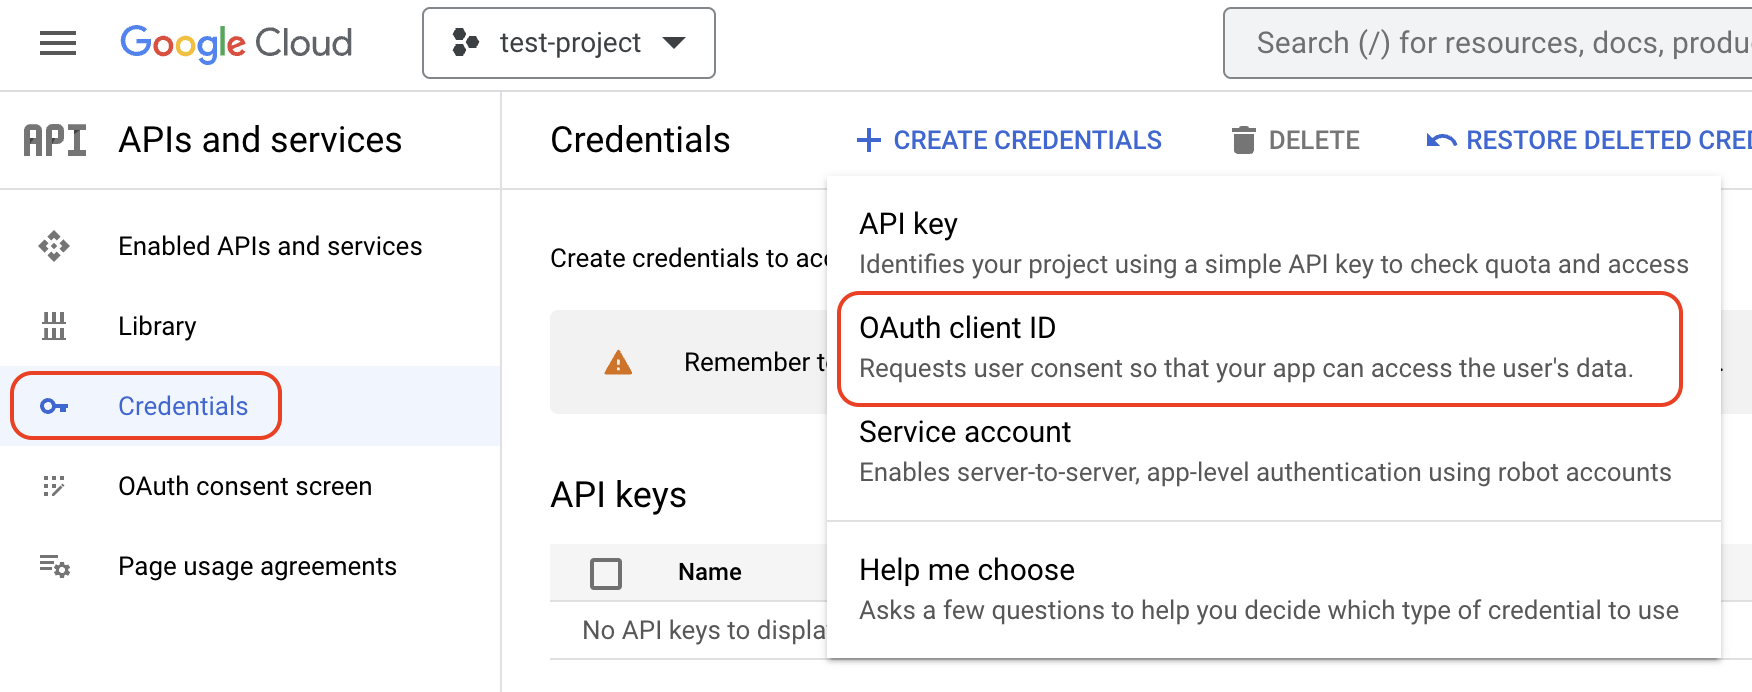
The next step is to create the OAuth 2.0 Client ID and setting this in Supabase. Selcting the the Credentials tab in the Google Cloud Console, click Create Credentials and select OAuth client ID.
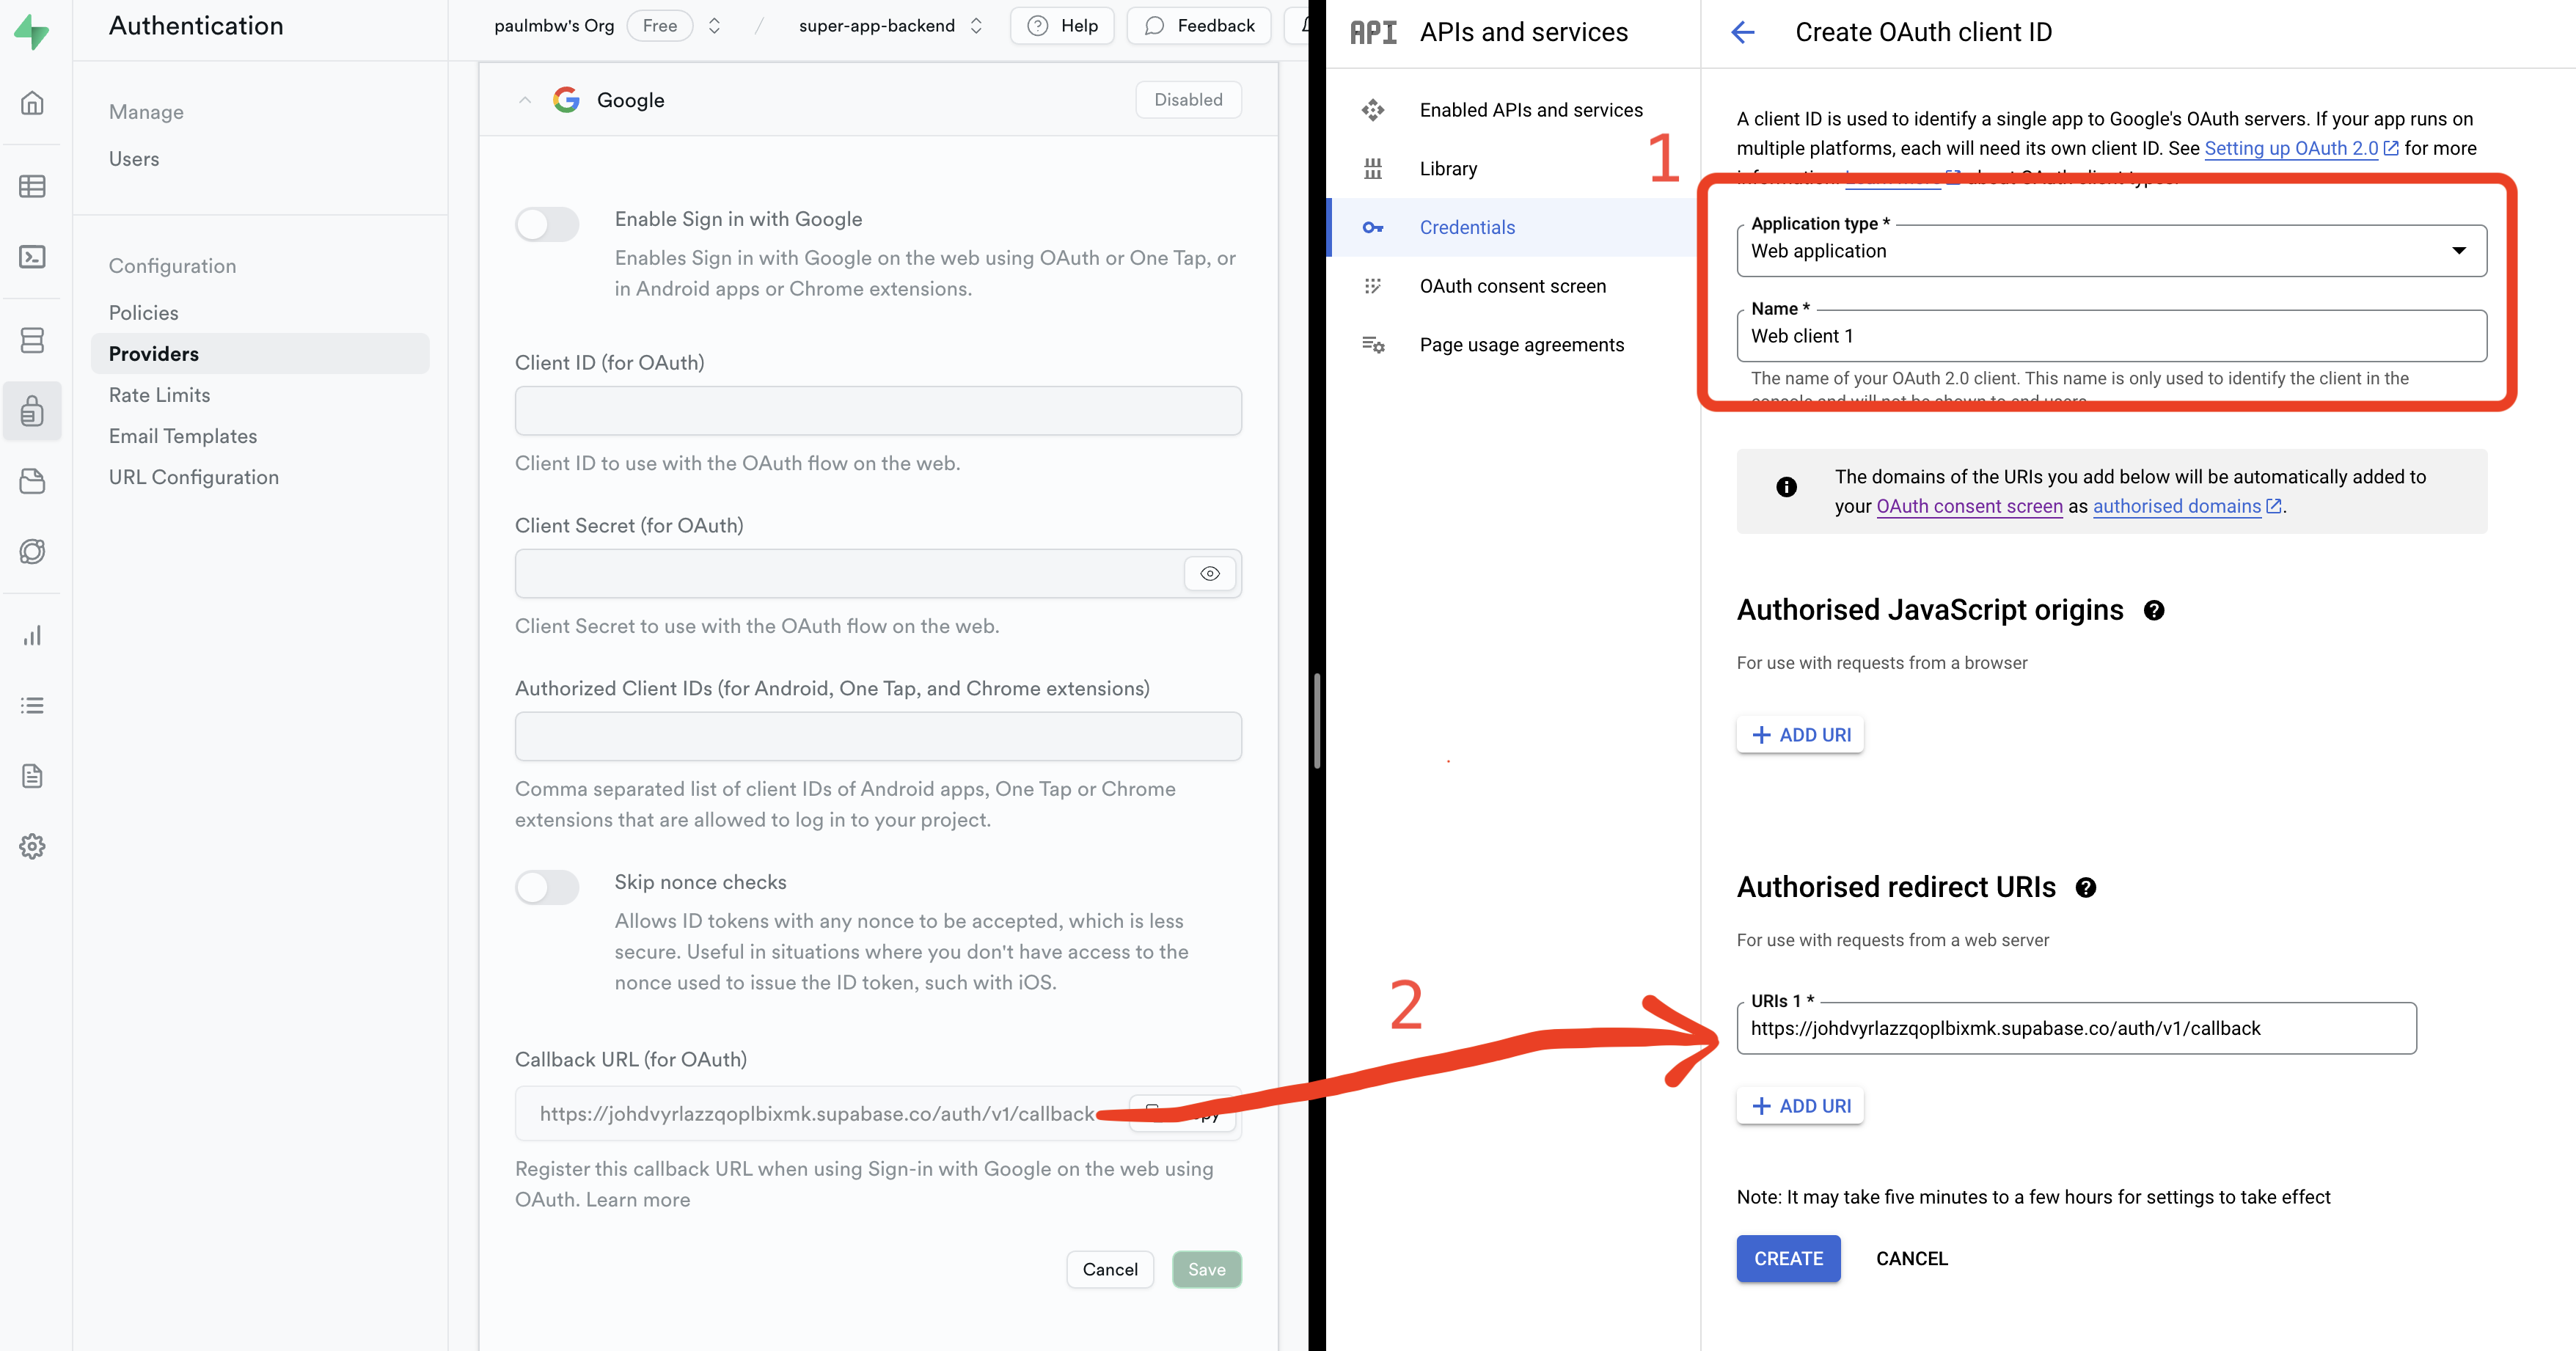
Next, set the application type to Web Application and give it a name. Finally, set the Authorised redirect URIs to the Callback URL (for OAuth) found in your Supabase project (ignore the Client ID and Client Secret for now, we will cover this in the next step):
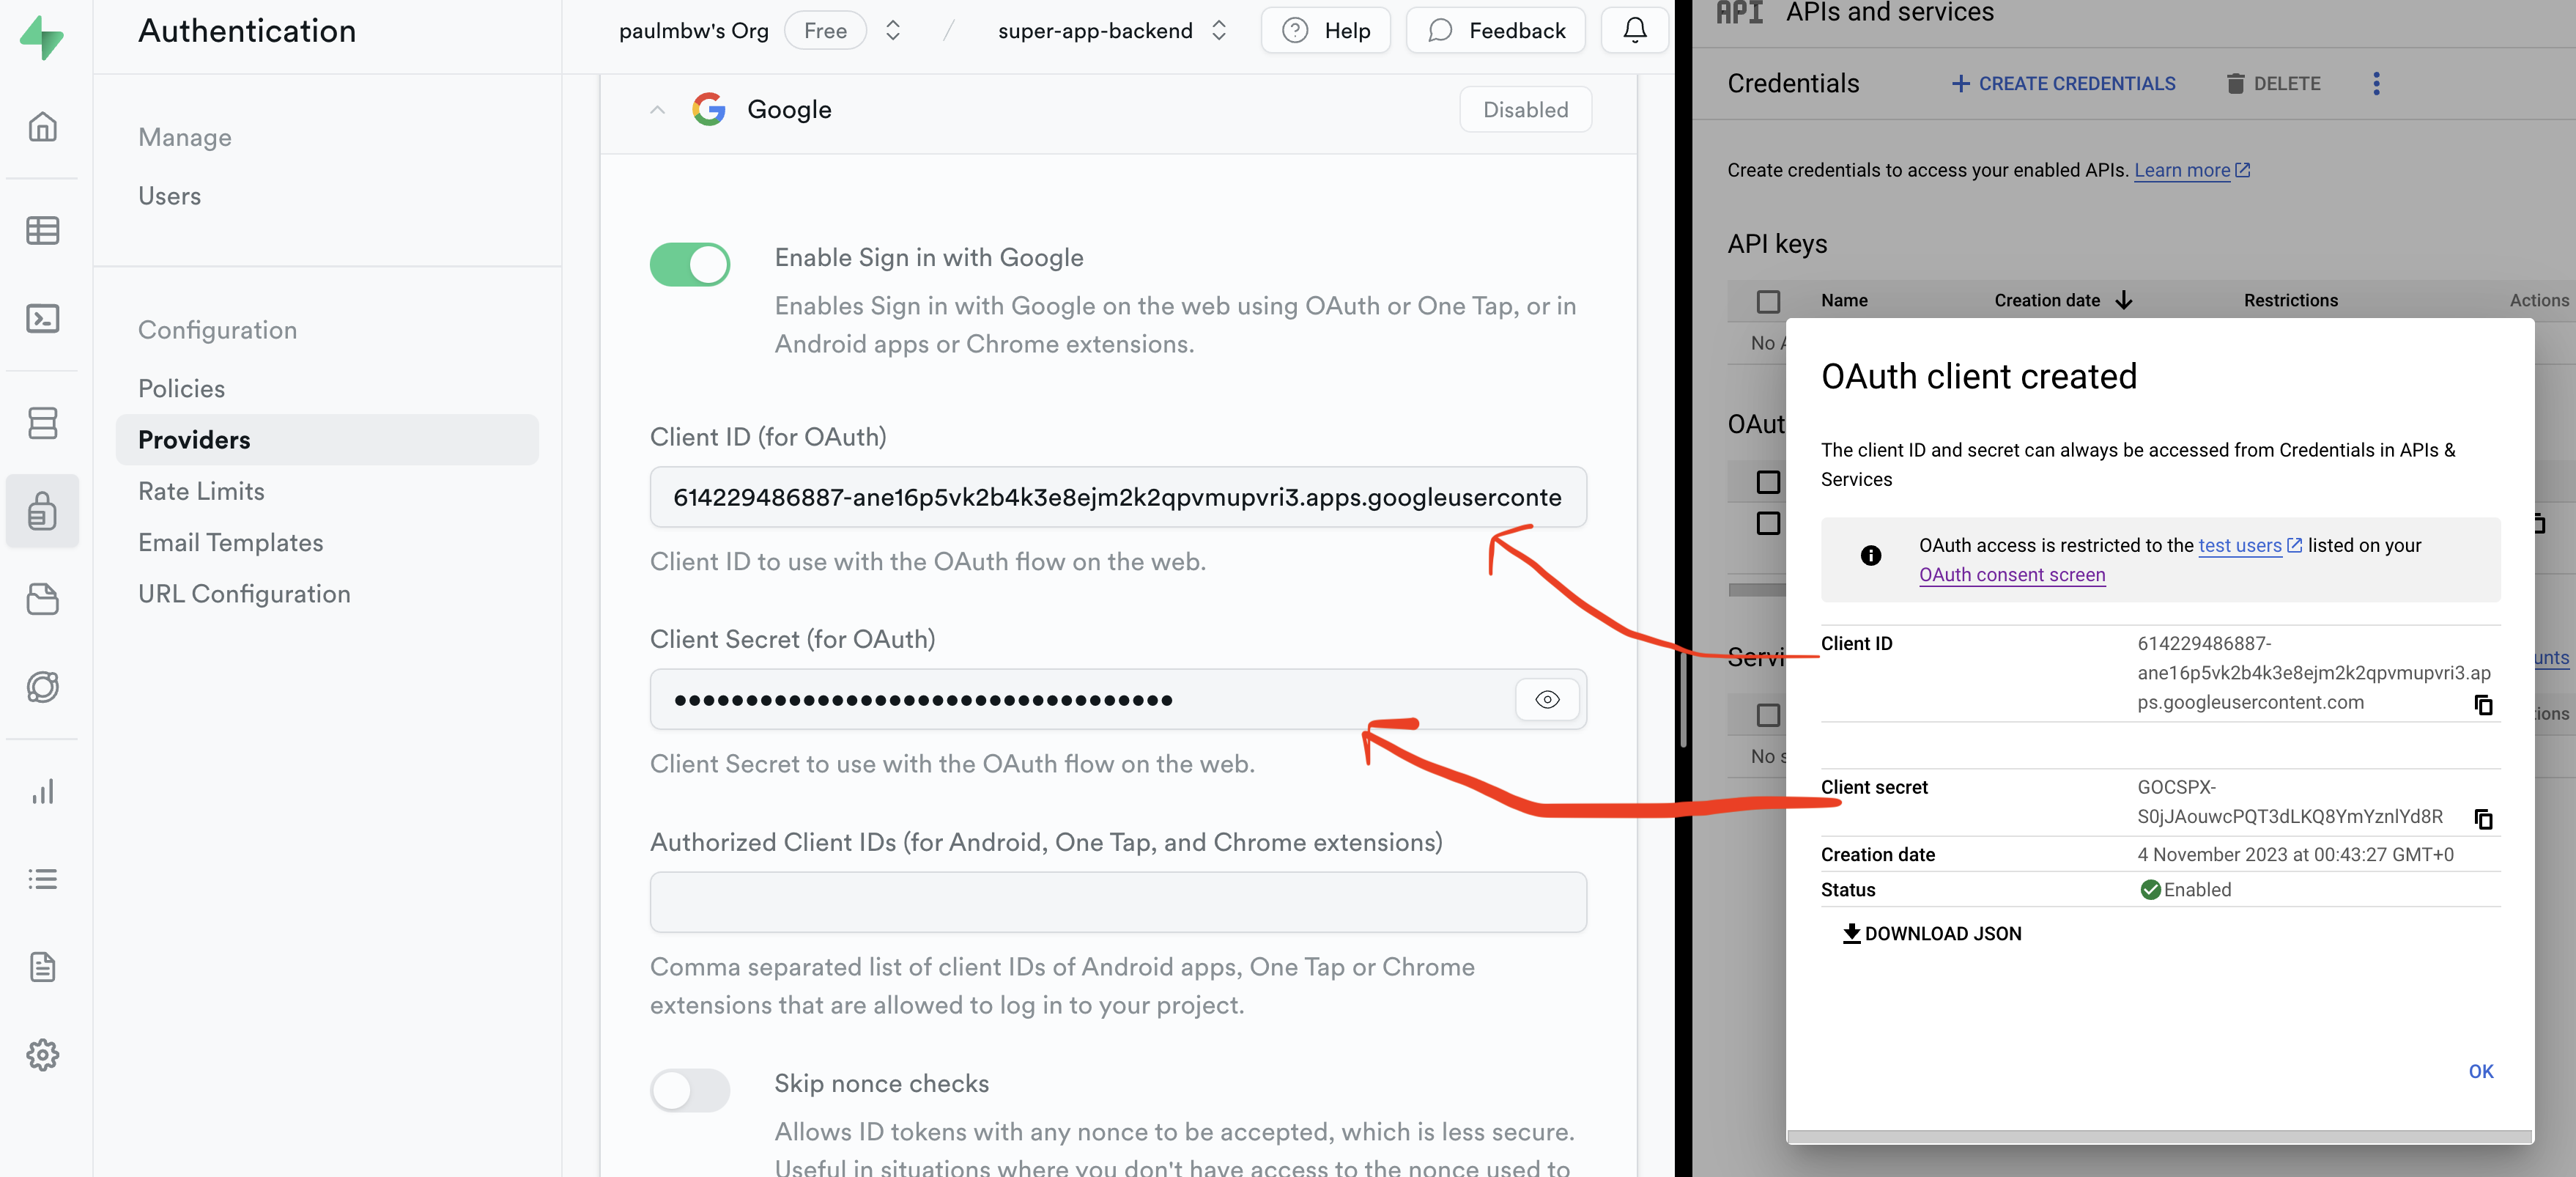
Once you're done, click Create. You will be presented with a modal titled OAuth client created - you need to then copy the Client ID and the Client secret and set both of these values in Supabase (ignore the Authorised Client IDs, we will cover this in the next step):
For the Authorised Client IDs, the steps are simiar; create a new OAuth 2.0 Client ID credential, set the application type to Android and complete the following:
- set the Package name to the package value that is set in your
app.jsonfile in the boilerplate app (you can change this value to suite your app accordingly):

- set the SHA-1 signing certificate fingerprint. Inside of your boilerplate app directory, run the following command:
keytool -keystore ./android/app/debug.keystore -list -vYou will be prompted to enter a keystore password: the default password for the debug keystore is android (you can read more about this
on the Google client auth guide here (opens in a new tab)). Once
you enter the default password, the output should resemble the following:
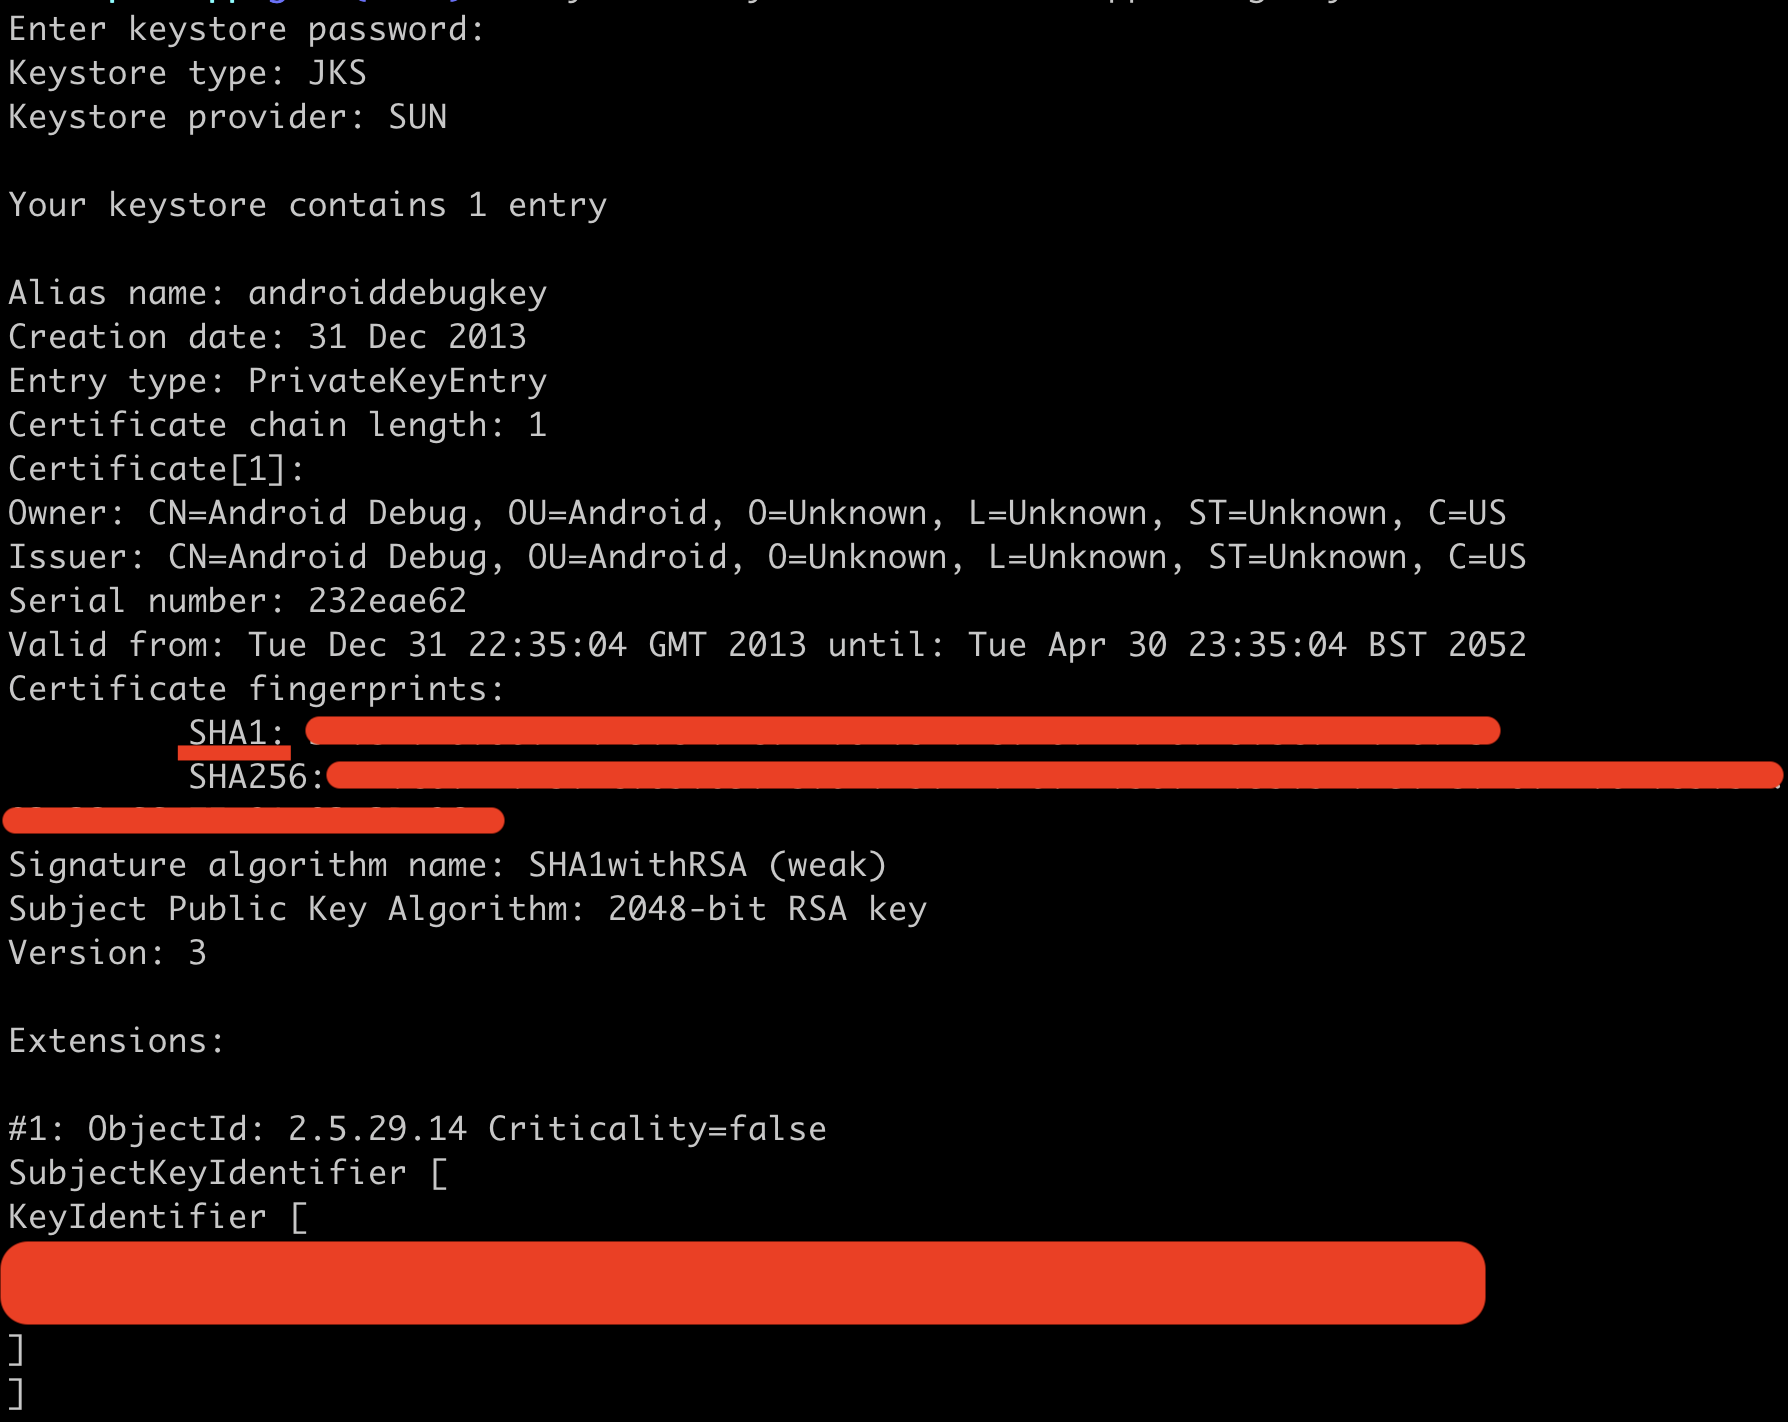
Copy the SHA1 value only, and paste this into the SHA-1 certificate fingerprint input. Now, click Create.
Once complete, as before you will be presented with a modal that displays the generated Client ID - copy this value and paste it into the Authorised Client IDs field in Supabase.
Error when adding SHA certificate in Google Console
You may encounter an error related to the SHA certificate belonging to an existing Google Cloud project. To address this:
-
cdinto theandroid/appdirectory and delete thedebug.keystorefile -
recreate the file using the command below:
keytool -genkey -v -keystore debug.keystore -storepass android -alias androiddebugkey -keypass android -keyalg RSA -keysize 2048 -validity 10000
You will be prompted with a set if questions - just press enter to skip and answer yes to the last question. Once completed, re-run the command to generate
the SHA cirtificate:
keytool -keystore ./android/app/debug.keystore -list -vDemo
Once you've completed all the above steps, you should be able to sign in with Google on both iOS and Android. Here is a demo of the process alongside verifying the user was authenticated in Supabase: