Stripe
Prerequisites
This integration relies on the backend API service for making payments in Stripe - ensure you have gone through the setup guide for the service here.
Taking payments in the app is achieved using Stripe (opens in a new tab), an online payment processing platform. Here's a diagram to explain the process for taking payments:
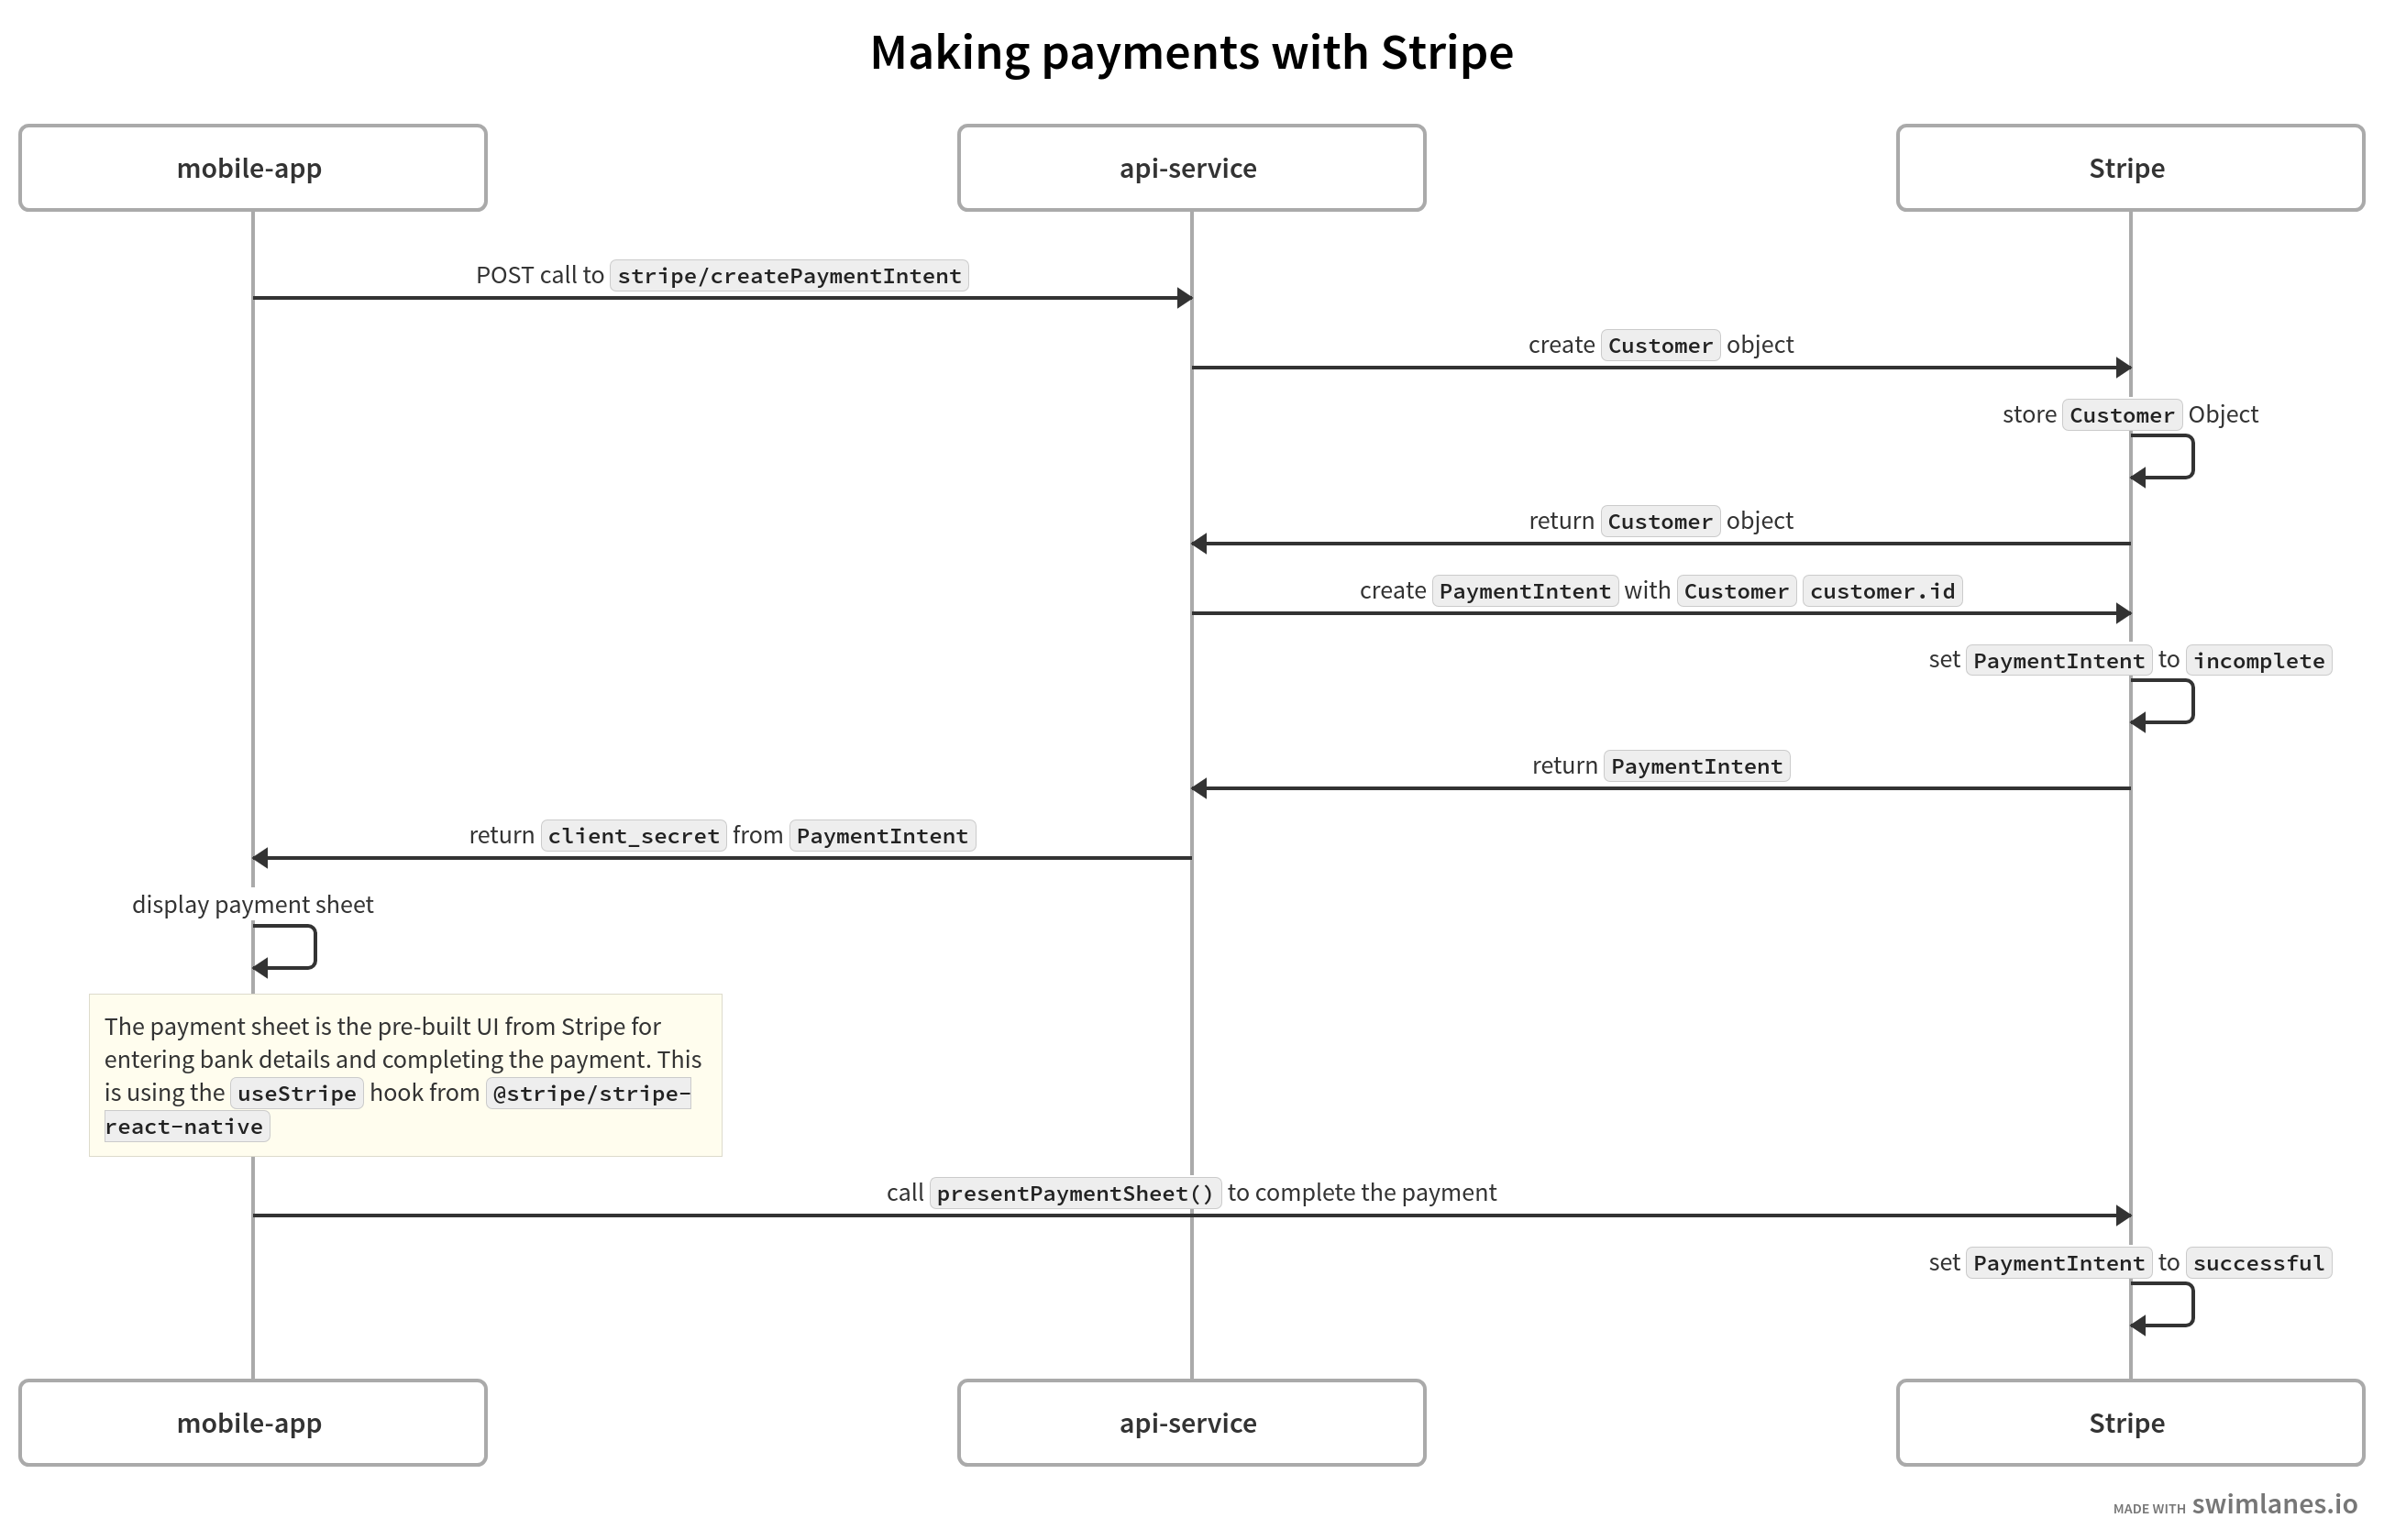
- A POST call (
/createPaymentIntent) is made from the app to the backend service. Bothamountandcurrencyare passed to the endpoint - The backend service then calls Stripe (using the
stripelibrary) to:- create a
Customerobject - this contains details such as the email address, no. of payments, refunds etc. - create a
PaymentIntentobject - this represents a single payment
- create a
- Returned from Stripe is a
client_secret. The client secret is used to complete a payment from the mobile app - In the mobile app, a payment sheet is created and displayed - this is where users will enter their bank details and complete the payment
Enabling Stripe
First, create a Stripe account with your email address. Then, ensure you enable Test mode and copy the Publishable key from the Developers dashboard:
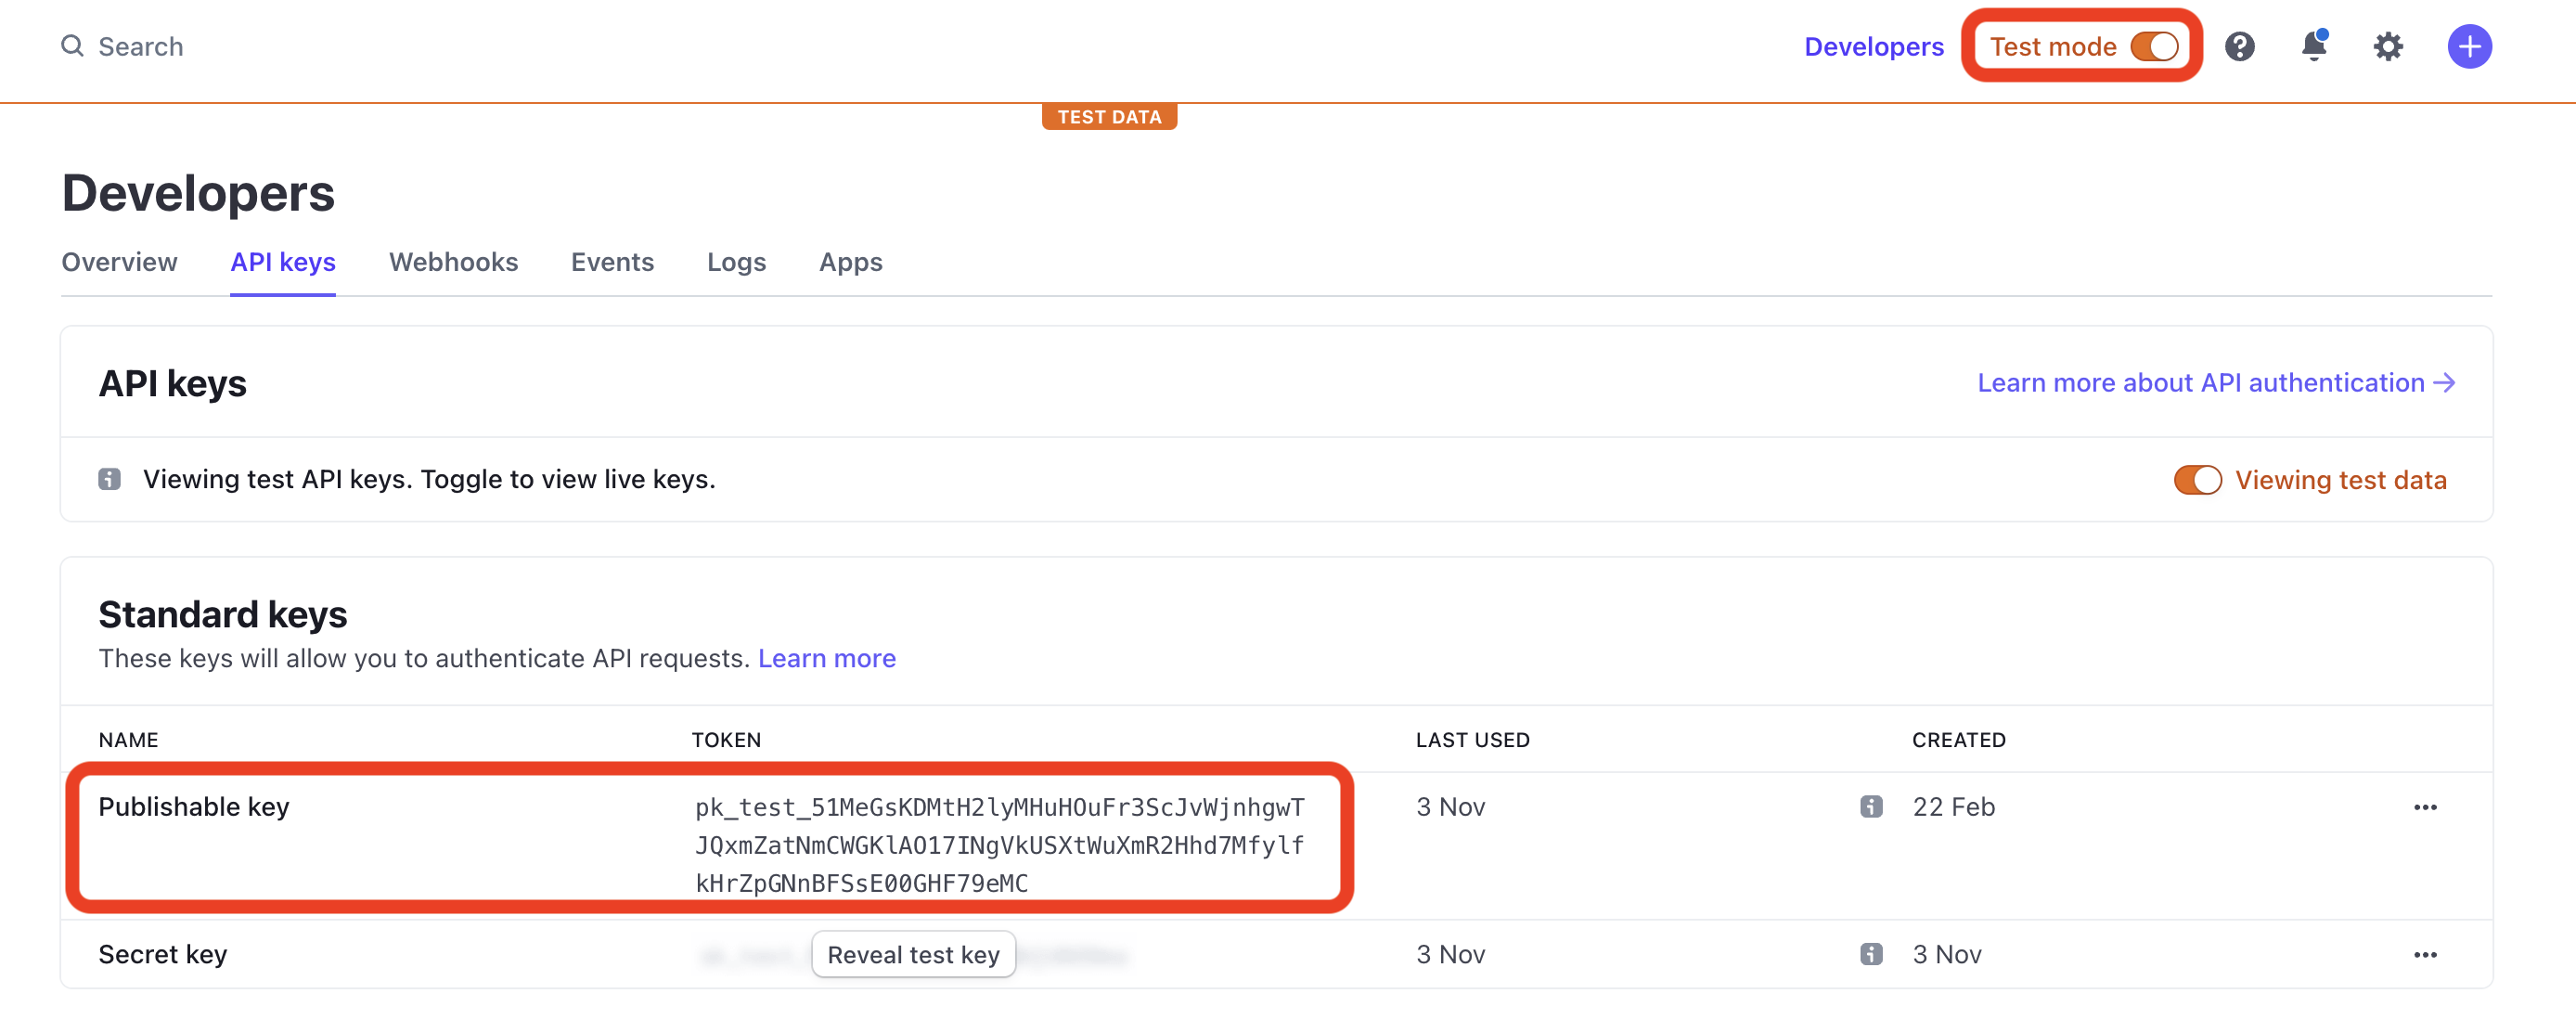
Once copied, head over to your .env file and replace the default value for EXPO_PUBLIC_STRIPE_PUBLISHABLE_KEY with the publishable key you
copied earlier. This is an important step as the app contains a <StripeProvider /> component (in app/components/Stripe/StripeProvider.tsx)
that uses this key to initiate Stripe in the app:
const StripeProvider = ({ children }: StripeProviderProps) => {
  const publishableKey = process.env.EXPO_PUBLIC_STRIPE_PUBLISHABLE_KEY;

  if (!publishableKey) {
    throw new Error("publishableKey is not set");
  }

  return (
    <Stripe.StripeProvider publishableKey={publishableKey}>
      {children}
    </Stripe.StripeProvider>
  );
};
You also need to make the same changes in the backend service: update STRIPE_API_KEY in your .env file with the Secret key from the
dashboard. This is important as the stripe library relies on the key as shown in src/routes/stripe.ts:
const stripe = require("stripe")(process.env.STRIPE_API_KEY);The next step is running the backend API service that exposes the /createPaymentIntent endpoint. See this guide on
how to run the service.
You'll notice the EXPO_PUBLIC_BACKEND_SERVICE_URL in your .env file. Update this file to whatever port the backend service is
running on, and the default port is 8080.
Calling Stripe from Android
If you're running the Android simulator, you will need to change EXPO_PUBLIC_BACKEND_SERVICE_URL
to http://YOUR_IP_ADDRESS:PORT. You can find your IP address using the command below (for Mac OS):
ifconfig | grep "inet " | grep -Fv 127.0.0.1 | awk '{print $2}'Next, you will need to expose a port on the Android simulator with the port of the backend service running on your machine. For example,
if the port of the service is 8080, you can run:
adb reverse tcp:8080 tcp:8080This will ensure your Android simulator can call the service that's running on port 8080 as this behaviour is not by default. You do not
need to do the same for the iOS simulator.
Demo
Here is a demo of making payments in the app with Stripe