Setting up Sentry
Sentry (opens in a new tab) is an error-tracking platform that helps developers monitor live applications. Included in this boilerplate is an example of intentionally throwing an error and sending it to Sentry for further debugging. We will go into detail on the setup and the example.
The sentry-expo library is used to interact with Sentry, and you can find the documentation here (opens in a new tab).
Why is Sentry the first integration to setup?
As part of the build process, there is a Upload Debug Symbols to Sentry task that runs which requires an API call to Sentry. In order for this to happen,
you need to set the appropriate environment variables that are described in this guide. You can read more information about Debug Symbols in Sentry
here (opens in a new tab).
Getting started
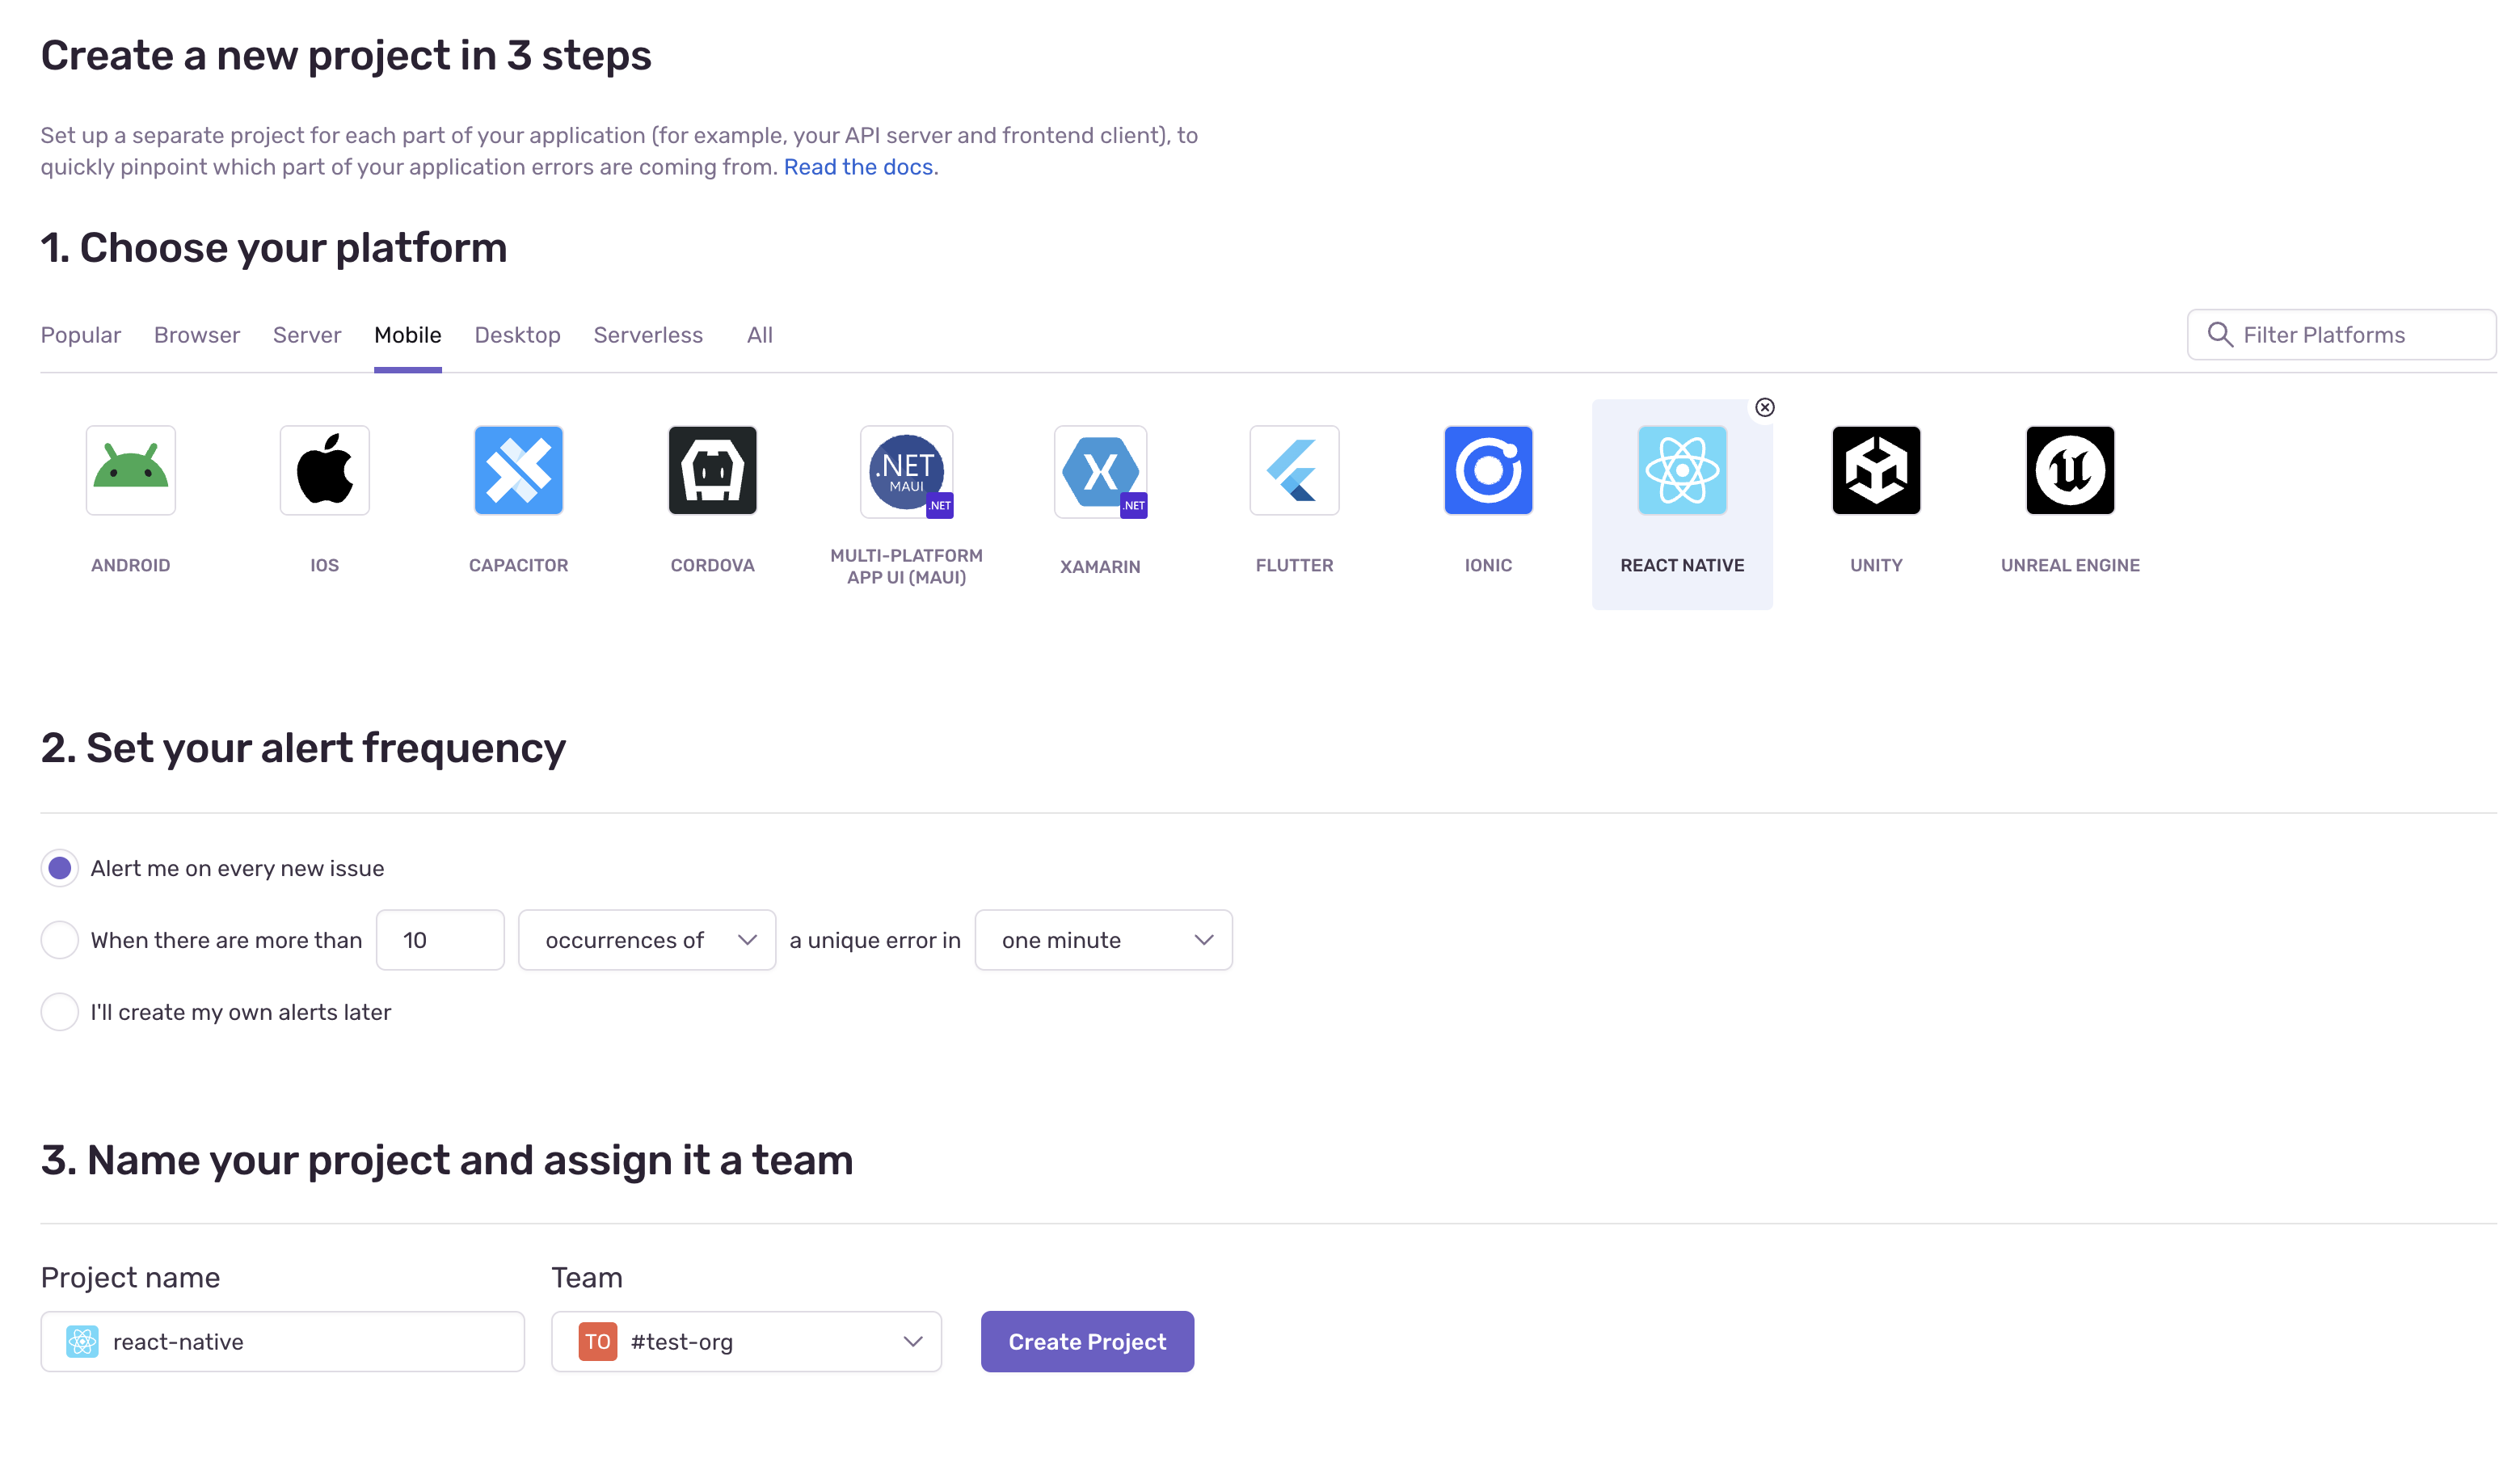
Firstly, create an account and complete the onboarding. Sentry will ask you to create an organisation, select the platform
you'll be monitoring for (in this case, React Native), setting the alert frequency and assigning a team to your project. Take
note of the project name and the organisation name as you'll need to set these values in your .env file of the
boilerplate app.
You will then be directed to configure your React Native SDK. You can ignore most of what is on the page, but you need to
copy the dsn that's created for you. In the Configure SDK section, copy the value shown (see the example highlighted in red below).
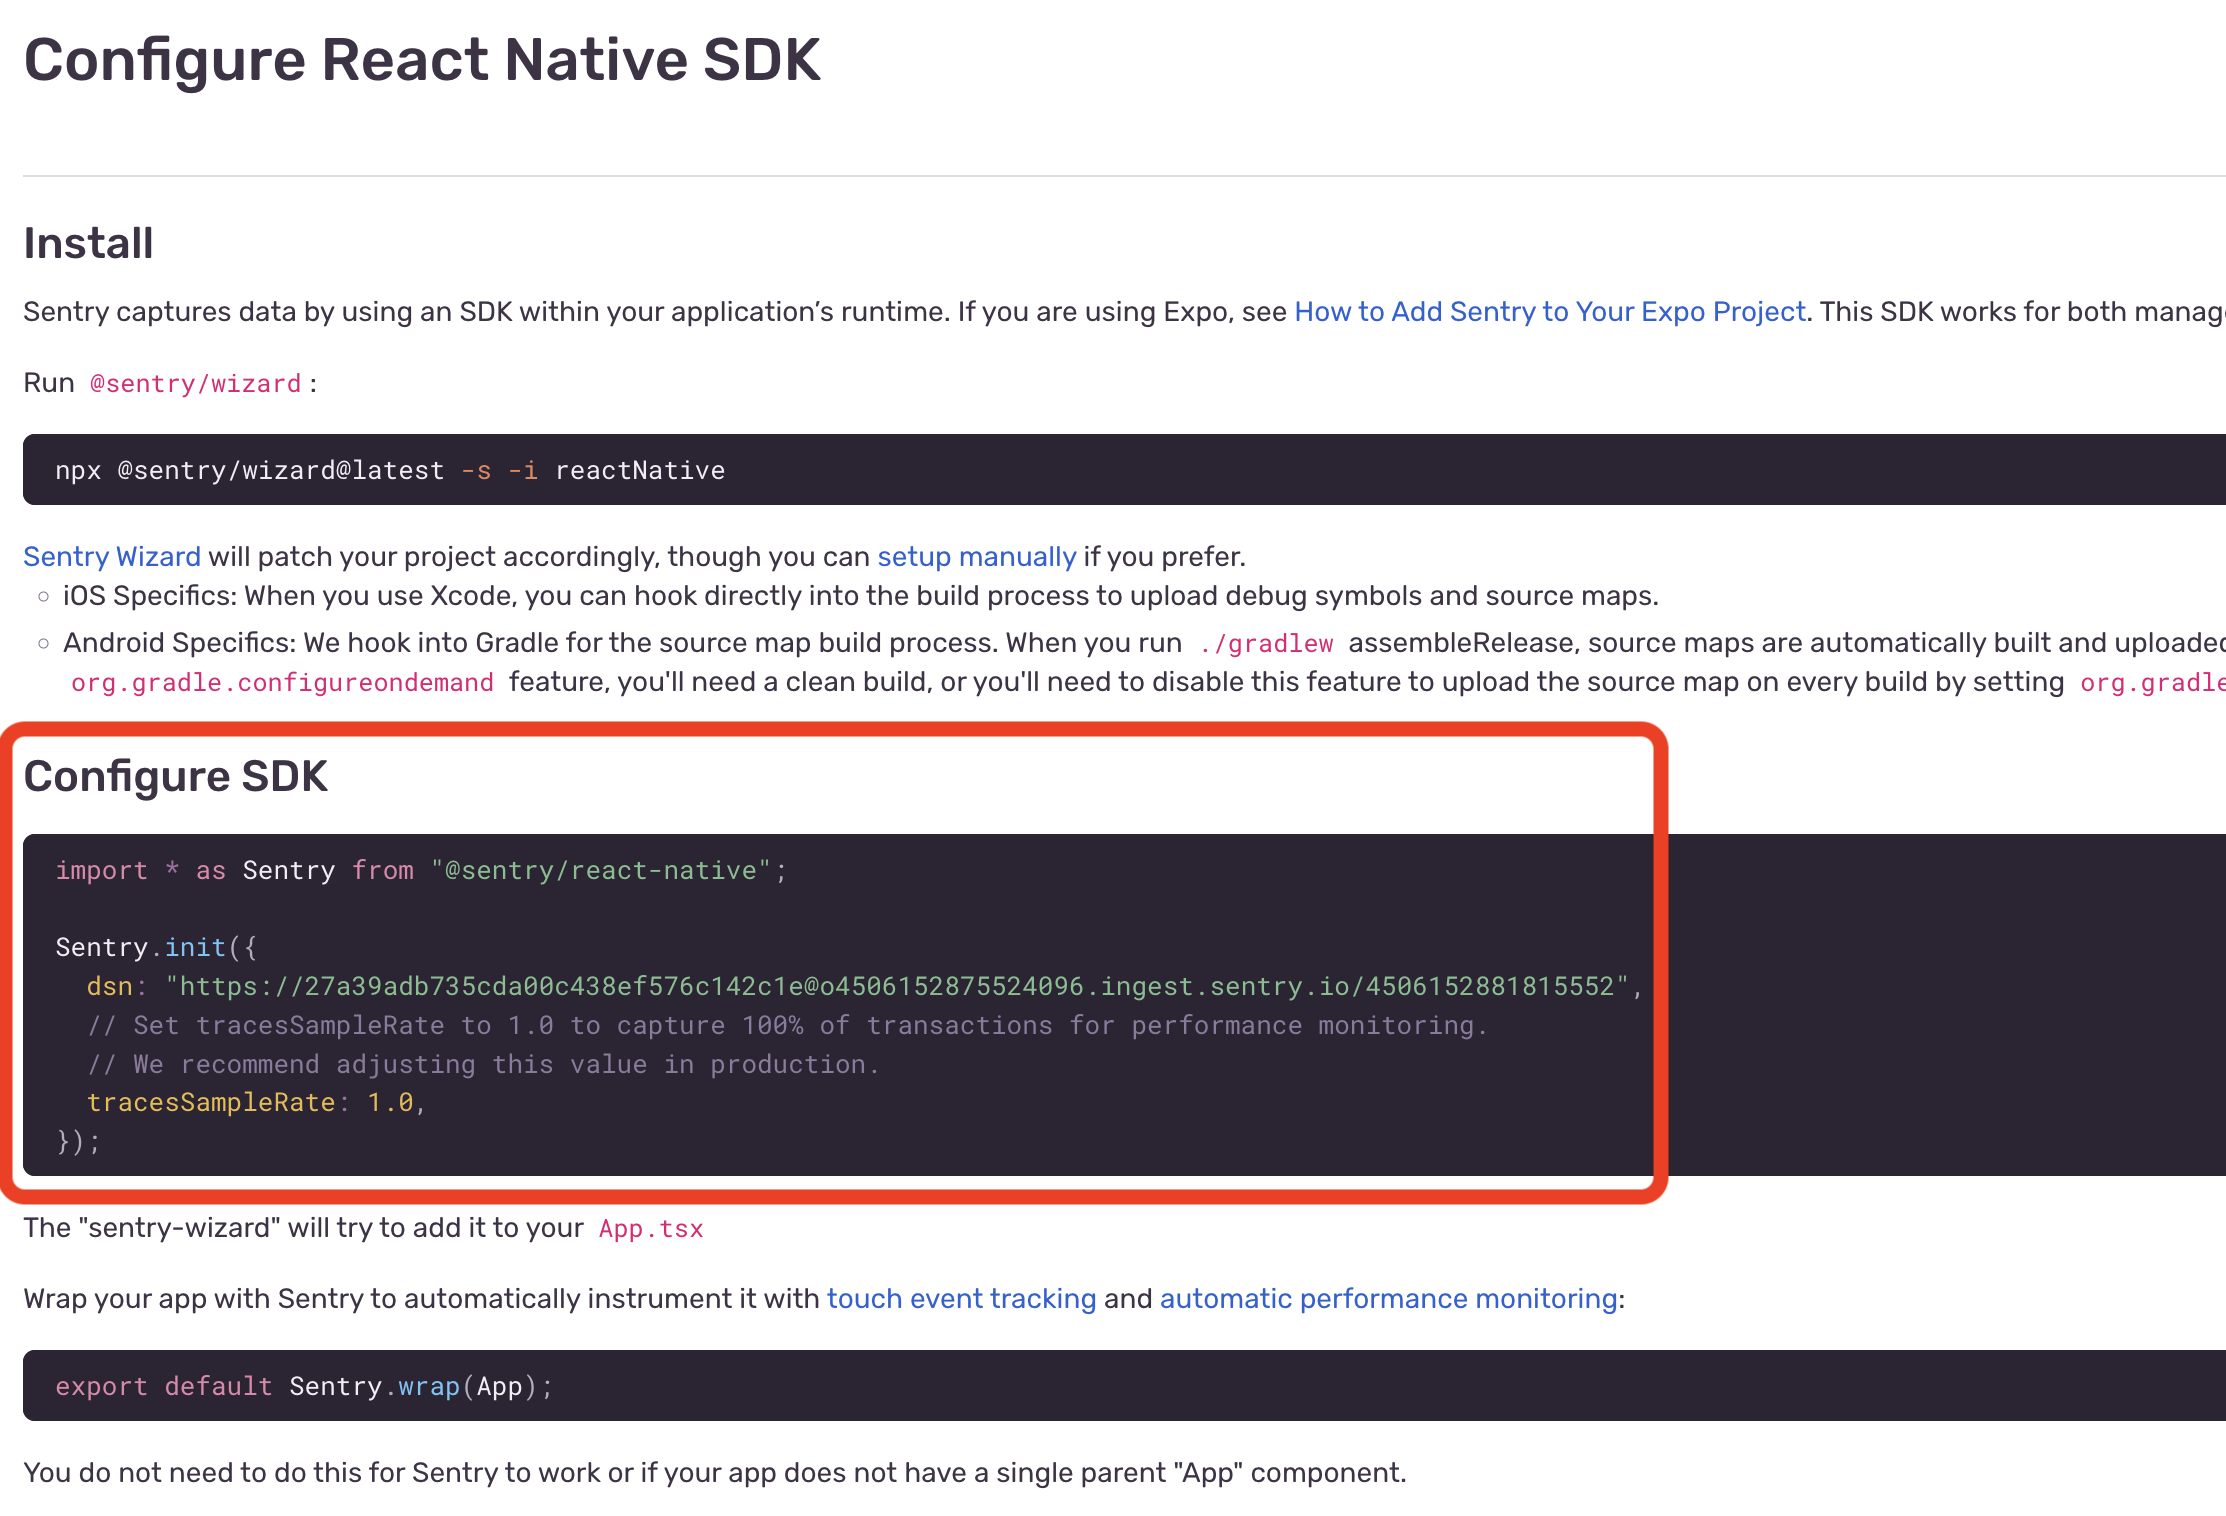
Taking the dsn value, replace the default value for EXPO_PUBLIC_SENTRY_DSN in your .env file. This environment variable is
used to initialise Sentry in app/components/Sentry/SentryProvider.tsx
Sentry.init({
dsn: process.env.EXPO_PUBLIC_SENTRY_DSN,
enableInExpoDevelopment: true,
});
const SentryProvider = ({ children }: SentryProviderProps) => {
return children;
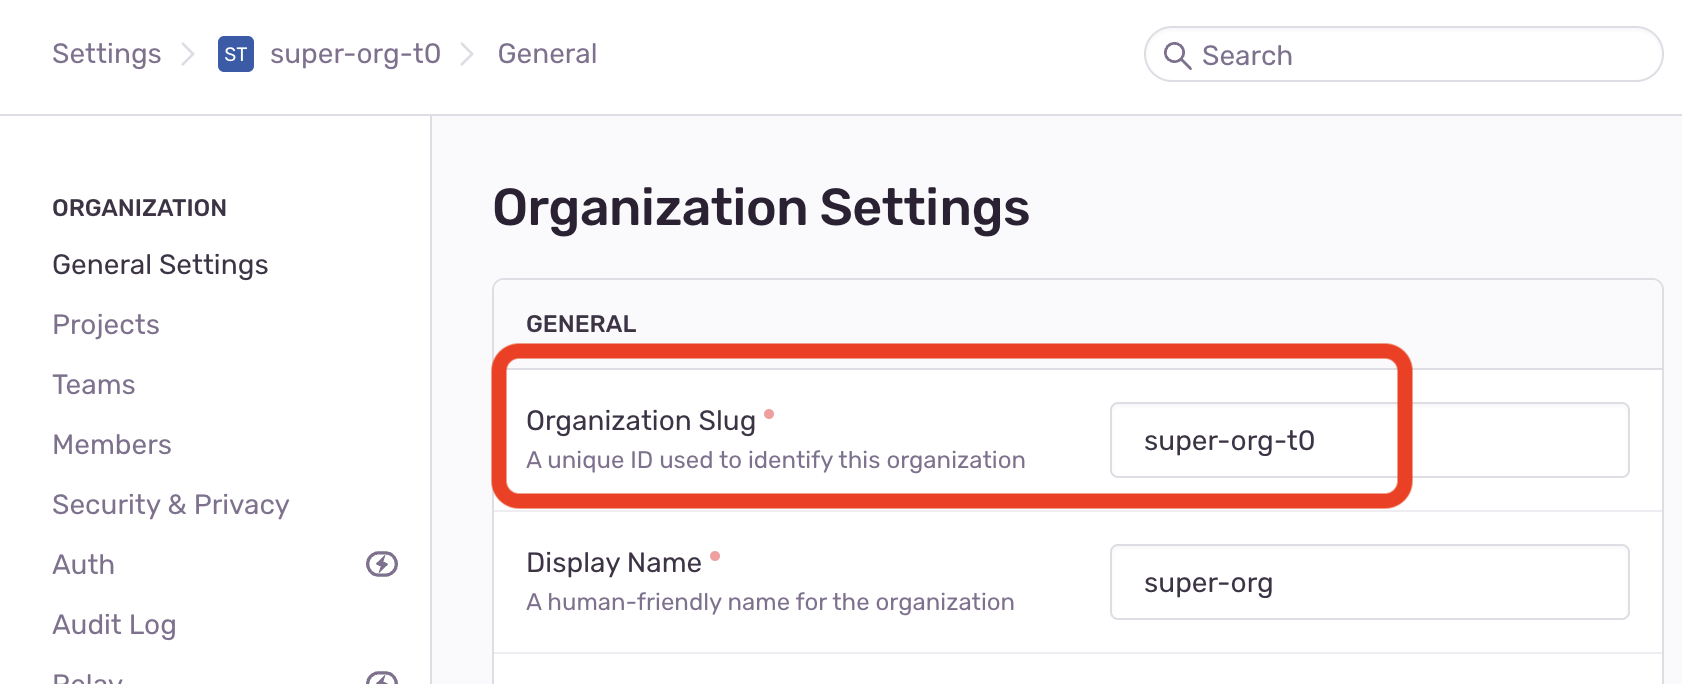
};You'll also need to set the SENTRY_ORG and SENTRY_PROJECT environment variables in the boilerplate app from the organisation slug
and the project name respectively (you can access this in the org and project settings in Sentry):
| Sentry Organisation Name | Sentry Project Name |
|---|---|
 |  |
Once setting up your Sentry organisation and project, the last step is to create an auth token. This is required for uploading the source maps to Sentry which will aid debugging errors in your app.
To create the token, you need to :
- install the
sentry-clihere (opens in a new tab) - login to your Sentry account here (opens in a new tab)
The CLI when then prompt you to open the browser and create a new auth token in the Sentry dashboard:
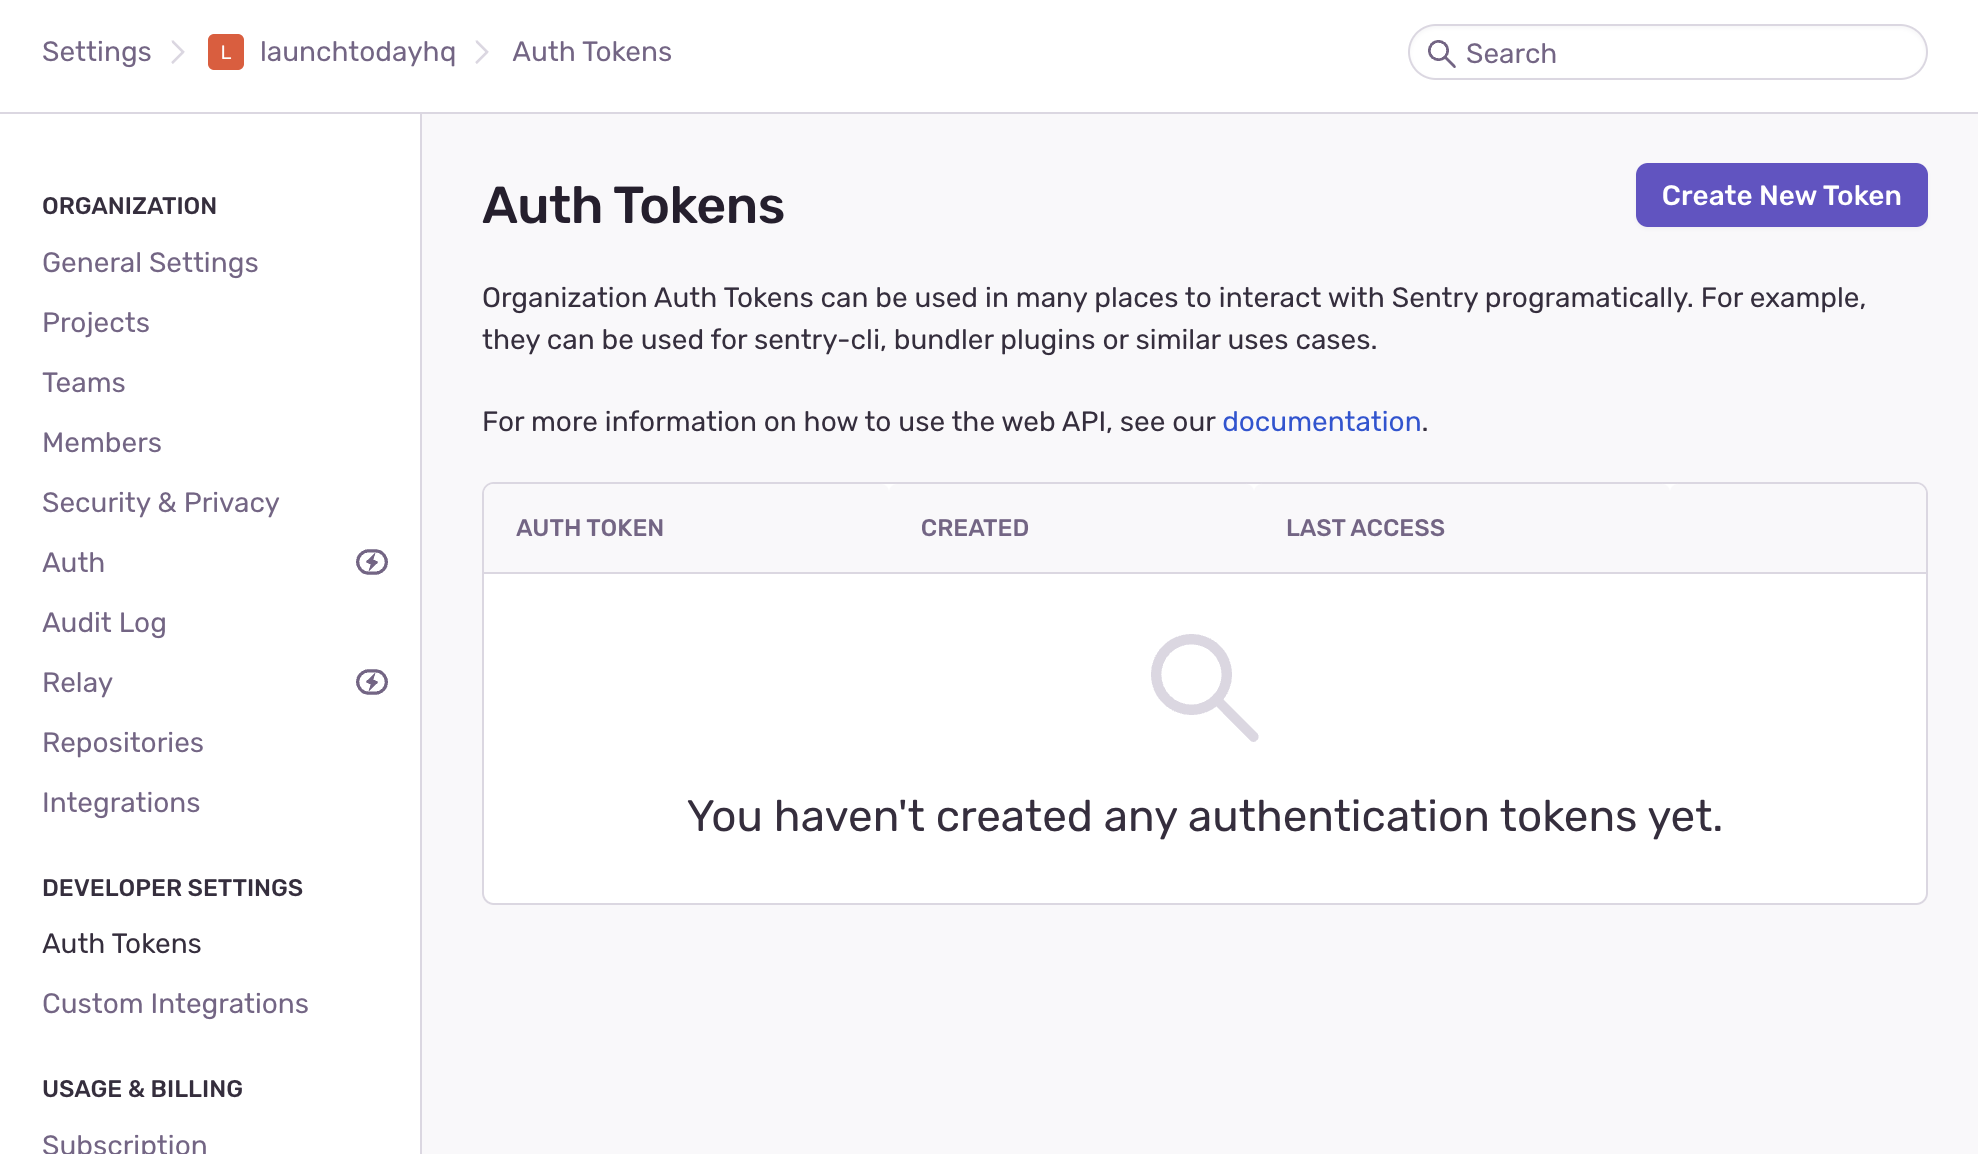
Once you've created this, replace the default SENTRY_AUTH_TOKEN value in your .env file with the newly created auth token.
Setting environment variables in Expo
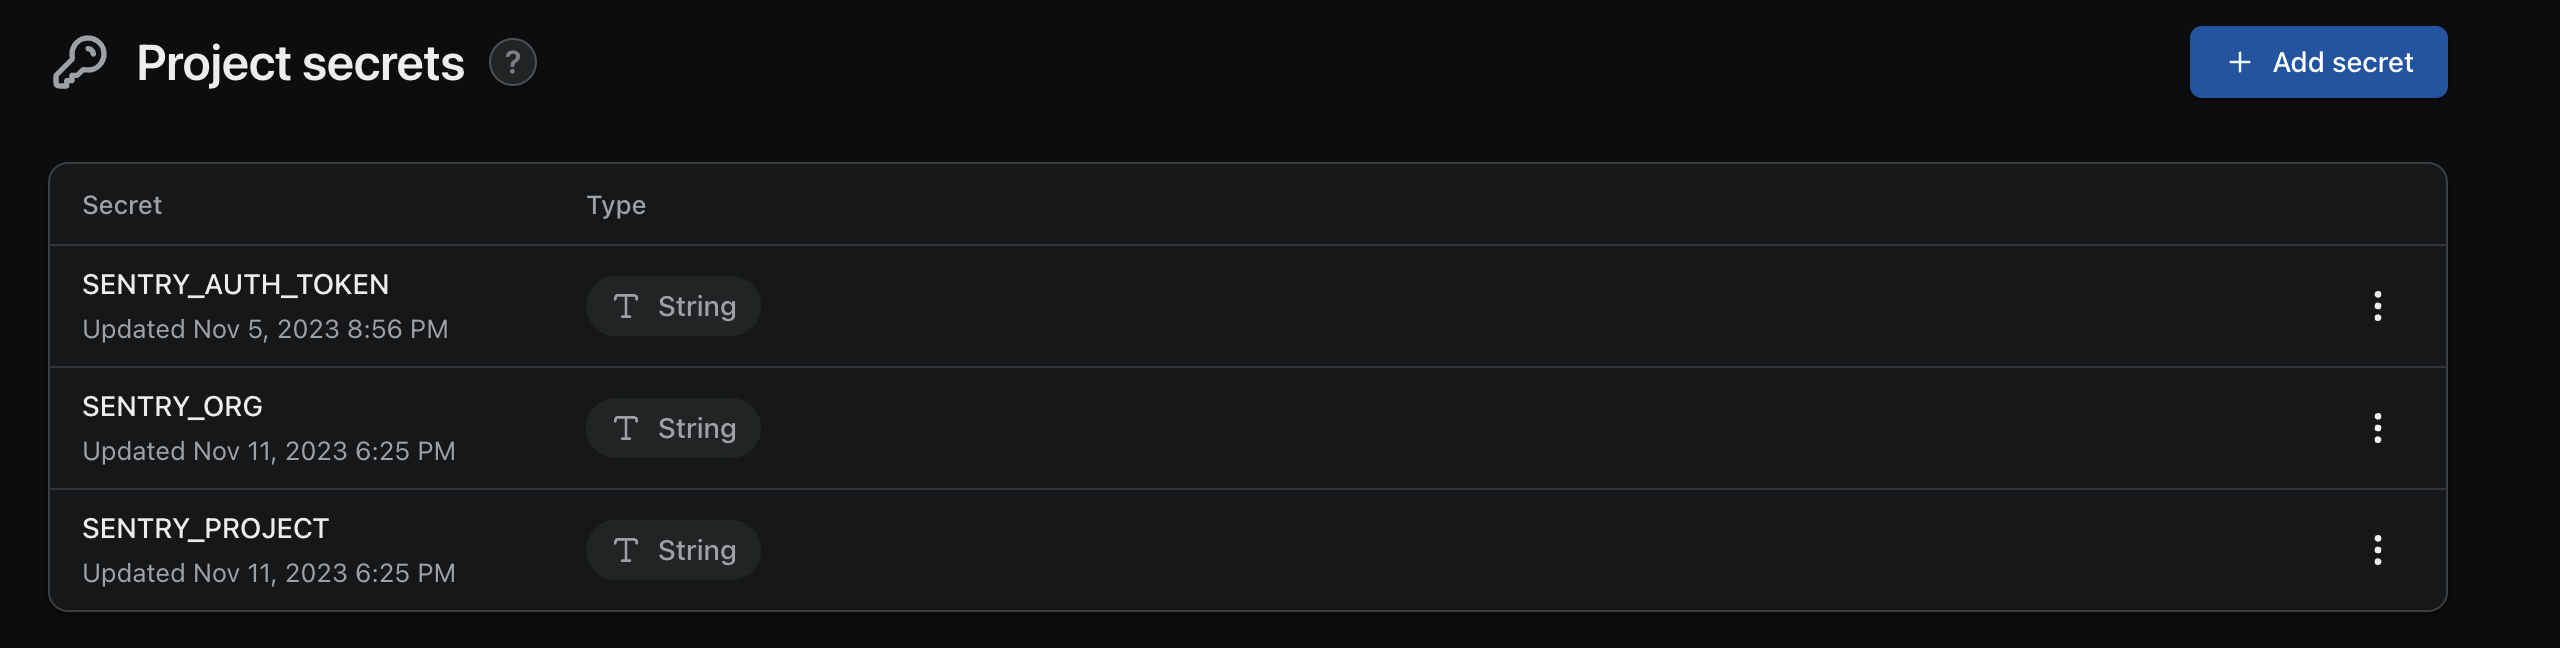
Once you've set your SENTRY_ORG, SENTRY_PROJECT and SENTRY_AUTH_TOKEN, you need to set these as project secrets in Expo. This
process is outlined in more detail here (opens in a new tab), but for now, head over to the project secrets
area of your app (the url should be https://expo.dev/accounts/paulmbw/projects/<PROJECT_NAME>/secrets) and set the aforementioned
variables:
Conclusion
Now that you've setup Sentry, you will be able to build the iOS/Android app locally.