Setting up RevenueCat
Prerequisites
- ensure you have created an account with both App Store Connect (opens in a new tab) and Google Play Store (opens in a new tab) - you will be unable to progress onto the next steps without both accounts (we will need API keys for setting up your RevenueCat account)
- in-app purchases are not availabile (opens in a new tab) on the iOS simulator and Android emulator. You need a physical device to test in-app purchases and subscriptions
Create RevenueCat account and project
Head over to RevenueCat (opens in a new tab) and create your account. Once complete, you should be able to create a new project. Give your project a name and click create project:
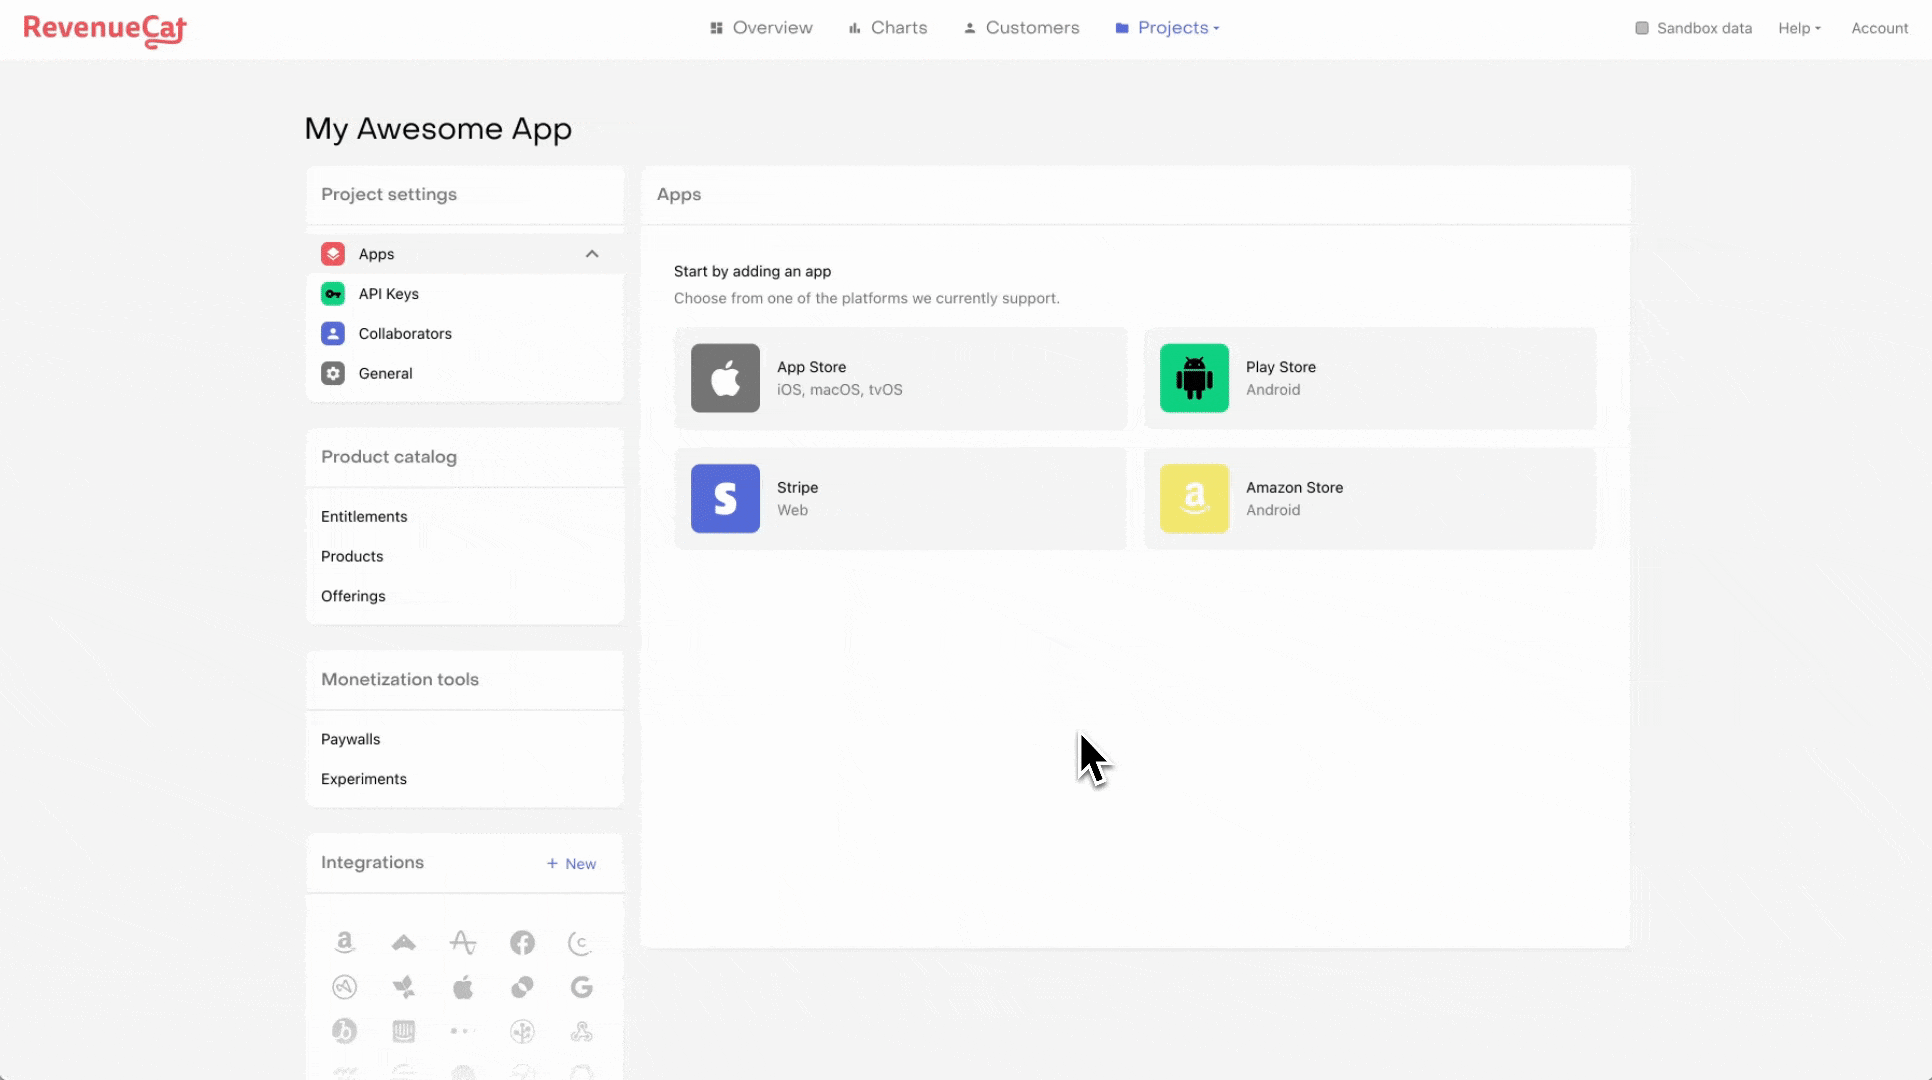
Once your project is created, we're interested in setting up two apps: one for iOS and the other for Android. Let's begin with the former first. Click App Store and add:
- an app name (this is the name of your app that will be published)
- the App Bundle ID (you can find this in the
app.jsonunderbundleIdentifierof the boilerplate) - the App Store Connect App-Specific Shared Secret (follow the instructions carefully here (opens in a new tab))
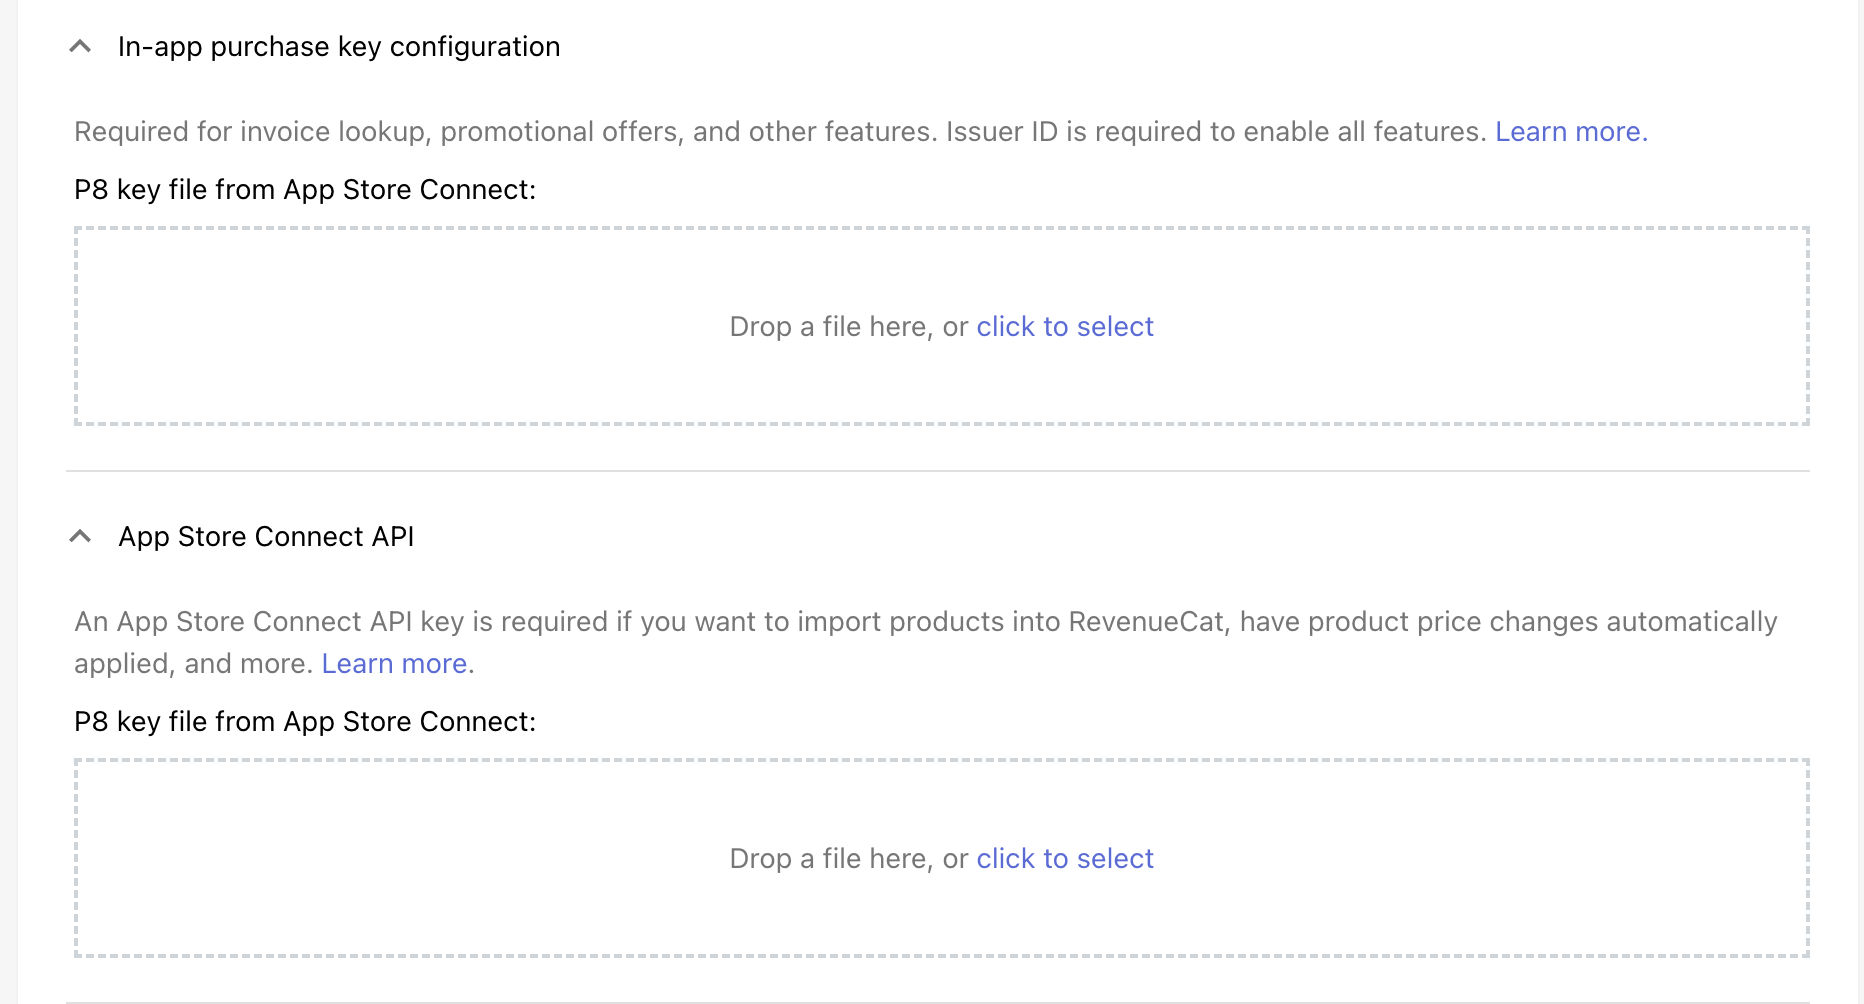
Upon adding the app name, bundle ID and the secret, click save changes on the top right. You will then be presented with the option to set the in-app purchase key configuration and the App Store Connect API. Follow the links provided on how to add the keys:
- In-App Purchase Key Configuration (link (opens in a new tab))
- App Store Connect API (link (opens in a new tab))
The next steps will cover creating in-app purchases and subscriptions in App Store Connect.